
Most landing pages underperform not because the offer is wrong, but because the page was never properly tested. A/B testing for landing pages strips away guesswork and replaces it with hard data, showing you exactly which headline, layout, or CTA drives more conversions. Yet a surprising number of businesses still launch pages based on gut feeling, then wonder why their conversion rates stay flat.
At SocialRevver, we build systems that turn short-form content into a predictable stream of attention. But attention without conversion is just noise. That's why the landing pages catching that traffic matter so much, and why split testing those pages is a non-negotiable part of any serious growth operation. Every view our Attention Engine™ drives to your funnel deserves a page that's been optimized through real performance data, not assumptions.
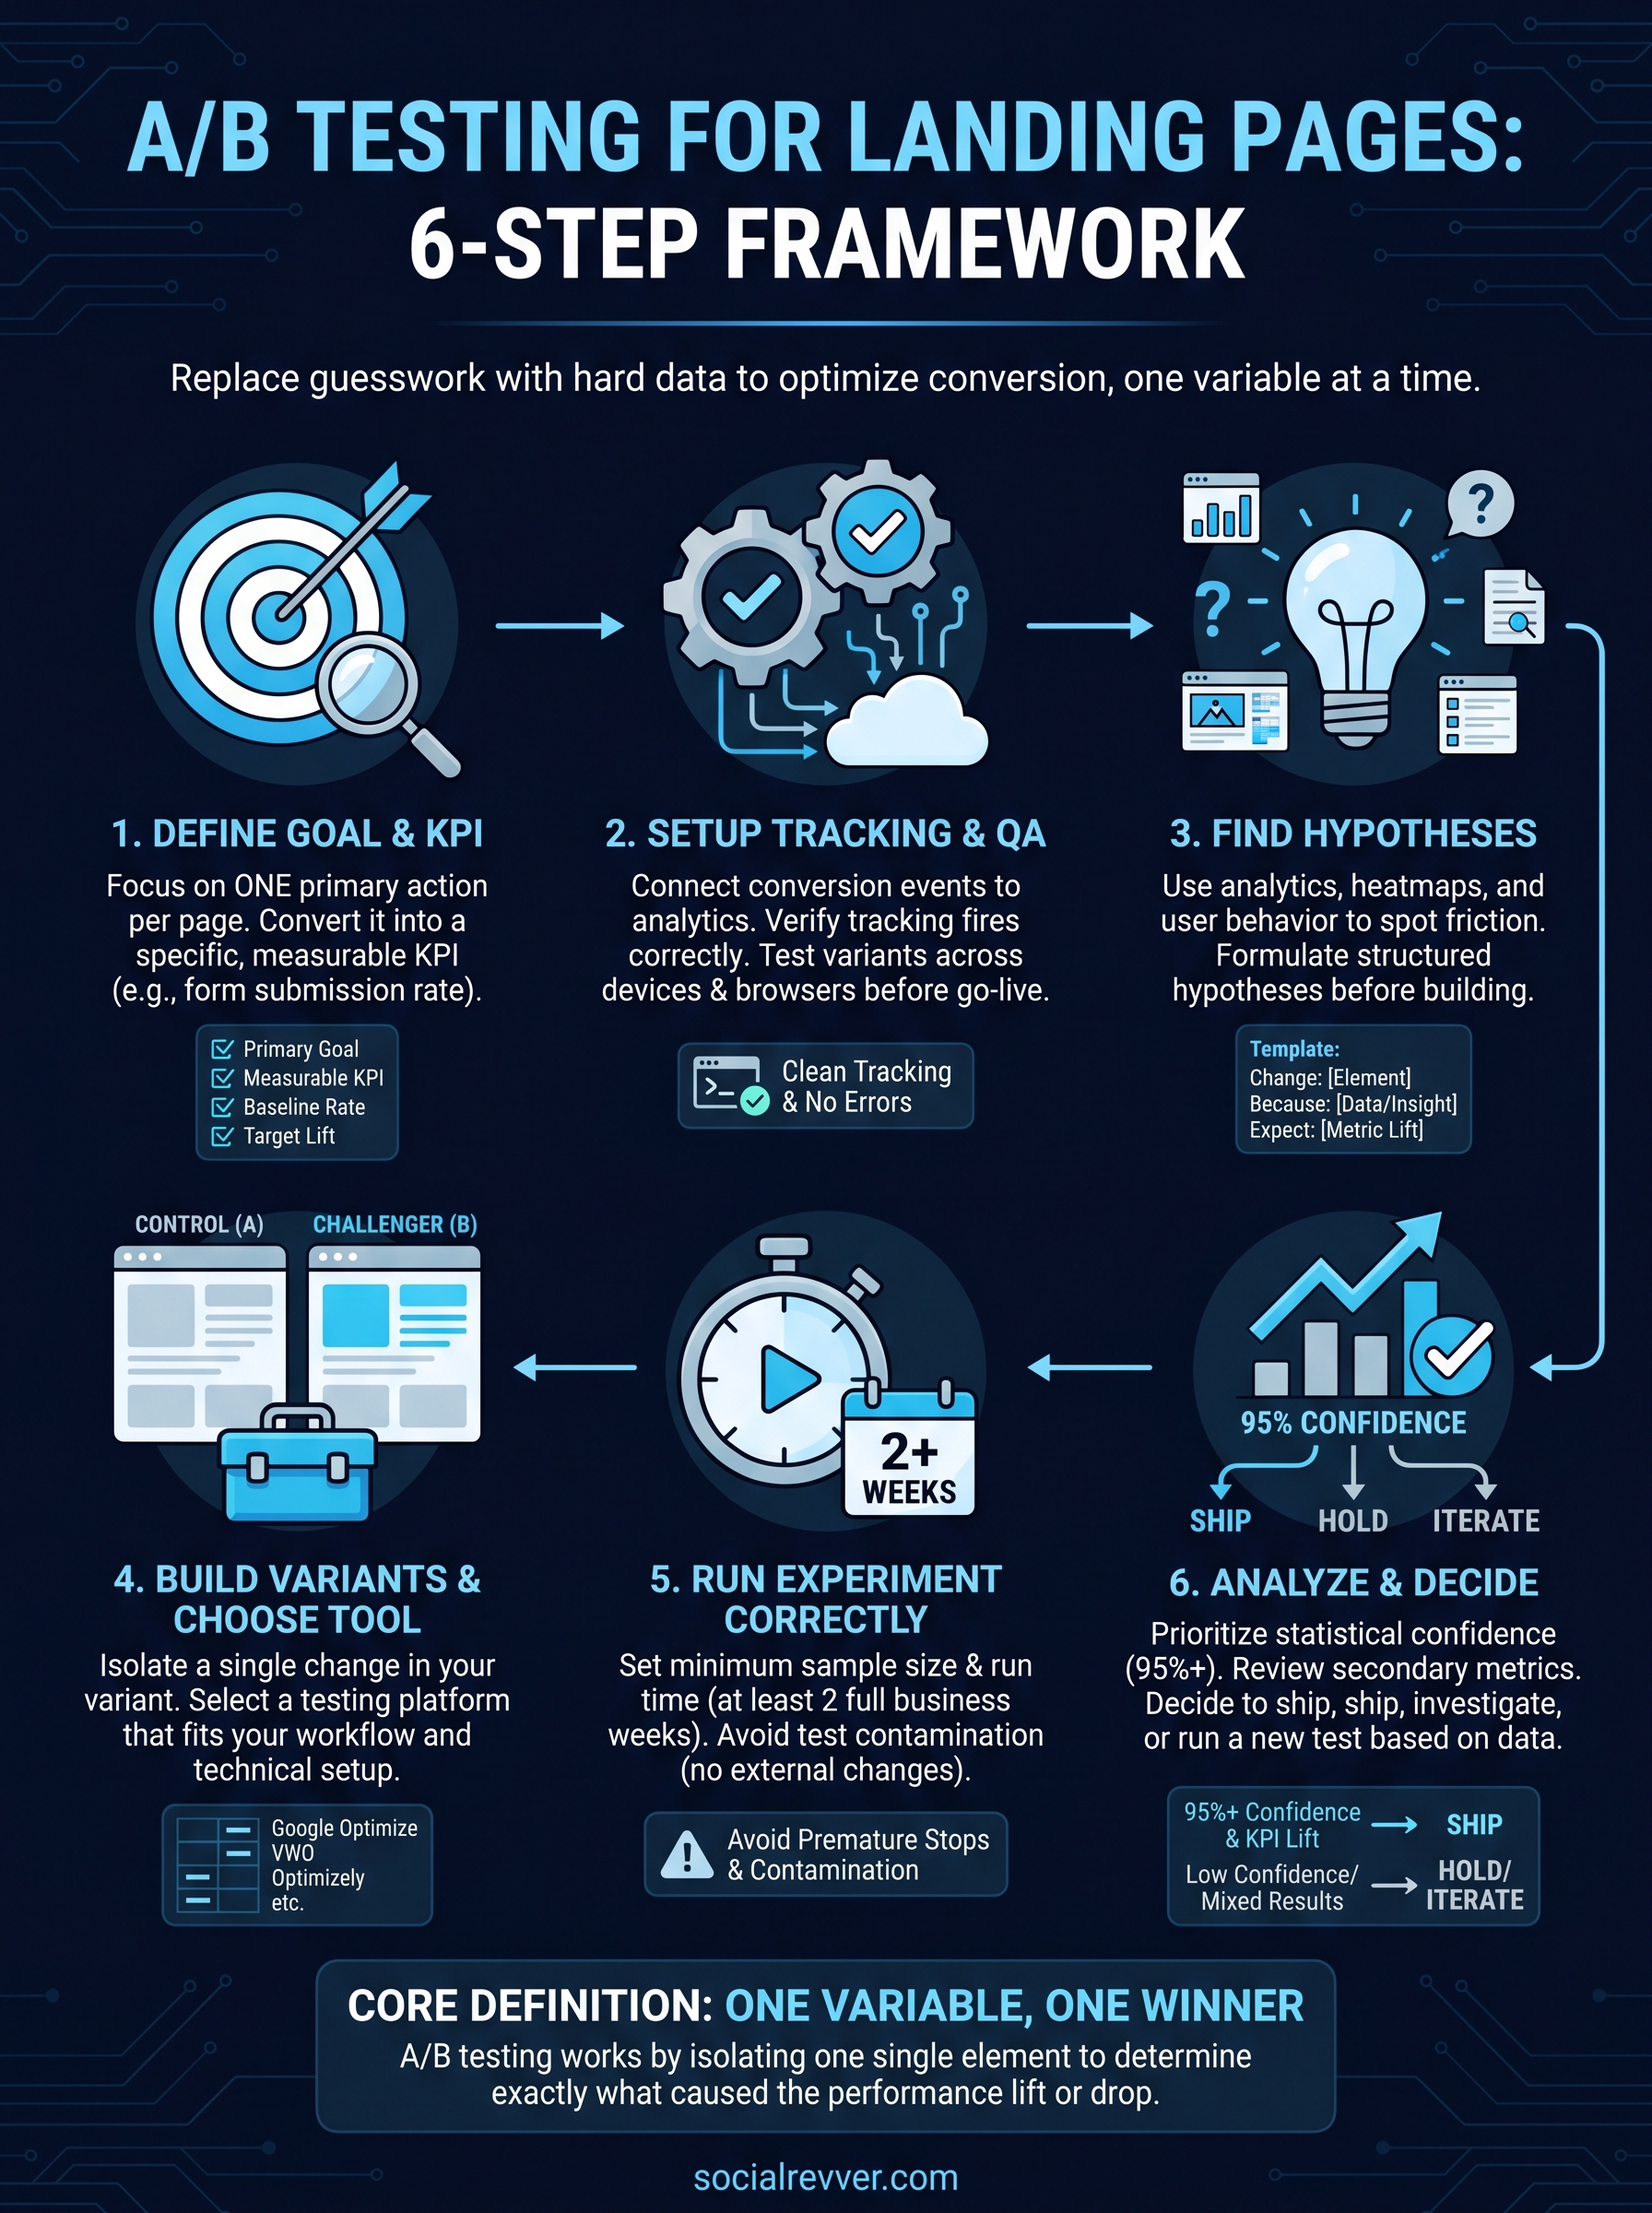
This guide walks you through the full A/B testing process for landing pages, from picking the right elements to test, to running statistically valid experiments, to choosing software that fits your workflow. Whether you're testing a lead magnet page tied to your organic content strategy or a high-stakes sales page, you'll leave with a repeatable framework you can apply immediately. Let's get into it.
What A/B testing is and what it is not
A/B testing, also called split testing, is the practice of showing two versions of the same page to different visitors at the same time and measuring which one produces better results. Version A is your control (the existing page), and version B is your challenger (the page with one deliberate change). Traffic splits between the two, behavior gets recorded, and at the end of the experiment you have real conversion data instead of opinions.
The core definition: one variable, one winner
The defining rule of a proper A/B test is that you change only one element at a time. That element might be your headline, your primary CTA button, your hero image, your form length, or your social proof section. When you isolate a single variable, you know with certainty what caused the lift or the drop. Change multiple things at once and you lose that clarity, which means you cannot replicate the result or learn anything useful for the next test.
A/B testing works because it separates what you believe from what your visitors actually do.
This is exactly why a b testing for landing pages produces compounding value over time. Each confirmed winner becomes the new baseline, and each new test builds on that foundation. After six months of disciplined testing, your page reflects dozens of proven decisions, not a single designer's first guess.
What A/B testing is not
A/B testing is not a redesign process. Many teams make the mistake of treating a test as an excuse to overhaul the entire page. When they see a lift, they credit "the new design." When they see a drop, they blame "bad traffic." Neither conclusion tells you anything actionable because no single variable was isolated. That is a design refresh, not an experiment.
Running a test for three days on low-traffic pages and declaring a winner is one of the most common mistakes in conversion rate optimization. Statistical significance requires a sufficient sample size, and calling results early leads to false positives that waste your next development cycle implementing changes that do not actually work.
A/B testing is also not the same as multivariate testing, which tests multiple elements changing simultaneously across many combinations. Multivariate testing requires substantially more traffic to reach valid conclusions and is better suited for large-scale sites with hundreds of thousands of monthly visitors. For most landing pages, a clean A/B split delivers faster answers with fewer resources.
| Test Type | Variables Changed | Traffic Required | Best For |
|---|---|---|---|
| A/B Test | 1 | Low to moderate | Most landing pages |
| A/B/n Test | 1 (multiple challengers) | Moderate | When you have 3+ hypotheses |
| Multivariate Test | 2 or more simultaneously | High | Large-scale, high-traffic pages |
Understanding these boundaries keeps your testing program focused and credible. When you know exactly what A/B testing is built to do, you stop expecting it to solve problems it was never designed to handle.
Step 1. Define your landing page goal and KPI
Before you touch a single design element, you need to know what you're optimizing for. A/B testing without a defined goal produces data you cannot act on. Every landing page you run through the a b testing for landing pages process must have one clearly stated conversion objective before the first variant gets built. Skipping this step means your results will look like numbers rather than decisions, and numbers without context do not drive action.
Pick one goal per page
Your landing page should drive one primary action. That action might be a form submission, a button click, a phone call, a trial signup, or a purchase. The mistake most teams make is loading a page with multiple CTAs and then running a test without knowing which action matters most. Clarity on your single goal shapes every decision that follows, from which element you test first to what metric defines a winner.
If your page asks visitors to do two things at once, your test data reflects two different behaviors at once, and you cannot build a clear conclusion from either.
Translate your goal into a measurable KPI
Once you have your goal, convert it into a specific metric your analytics platform can track. A vague goal like "more conversions" gives your testing tool nothing to measure. A precise KPI like "demo request form submissions on /free-trial" does. That specificity is what makes your results usable and your test setup defensible when someone asks why you shipped a particular variant.
Use this template to lock in your KPI before building any variant:
| Field | Example |
|---|---|
| Page being tested | /free-trial |
| Primary goal | Free trial signup |
| KPI (metric) | Form submission rate |
| Baseline conversion rate | 3.2% |
| Target improvement | +15% relative lift |
| Minimum detectable effect | 0.5% absolute increase |
Documenting your baseline conversion rate before the test starts is critical. Without a recorded starting point, you have no way to judge whether a variant actually improved performance. Pull at least 30 days of historical data from your analytics platform, write down that number, and treat it as your benchmark. Every test you run from this point forward gets measured against it, so accuracy here protects every decision you make downstream.
Step 2. Set up tracking, attribution, and QA
Running a test without proper tracking is the same as running a race without a finish line. Before you launch any a b testing for landing pages experiment, you need to confirm that every conversion event fires correctly, that attribution is clean, and that both variants behave exactly as intended across devices and browsers. This setup work takes an hour up front and saves you from discarding weeks of corrupted data.
Connect your conversion event to your testing tool
Your testing platform needs to know when a goal is completed. Most platforms connect to Google Analytics 4 via a conversion event, and the critical step is verifying that your event fires on the confirmation page or on the specific action, not on every page load. A misfiring event inflates your conversion rate and makes every test result unusable.
Your data is only as reliable as the events feeding it, so verify each trigger before your test goes live.
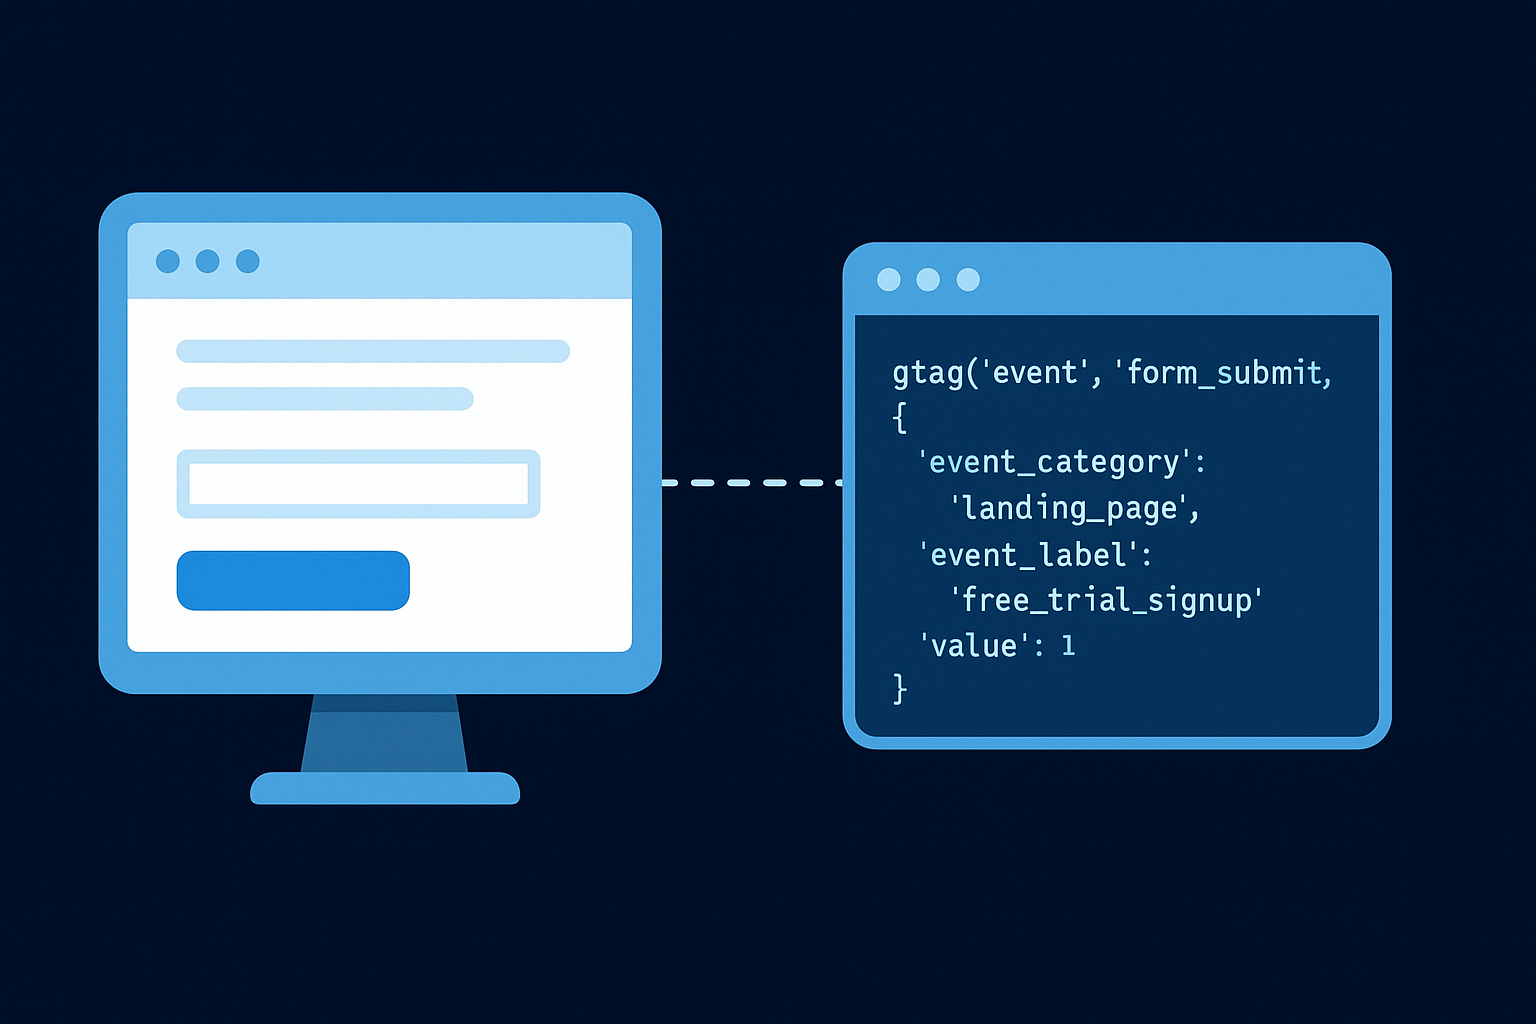
Place this basic GA4 event snippet on your form confirmation page to track a completed submission:
<!-- GA4 form submission event -->
<script>
  gtag('event', 'form_submit', {
    'event_category': 'landing_page',
    'event_label': 'free_trial_signup',
    'value': 1
  });
</script>
Place this in the <head> of your thank-you page or fire it on button click confirmation. Then open GA4's DebugView and confirm the event appears in real time before you build any variant.
QA your variants before going live
Once your tracking fires cleanly, test both the control and the challenger variant manually. Load each version on desktop, mobile, and tablet and confirm that every element renders correctly, all links point to the right destinations, and the form submits without errors. One broken variant corrupts your entire dataset and forces you to restart from scratch.
Run through this checklist for every test before it goes live:
- Conversion event fires correctly on both variants
- Page loads without errors on Chrome, Safari, and Firefox
- CTA buttons link to the correct destination
- Form fields submit and redirect to the confirmation page
- No console errors appear on either variant in browser DevTools
Step 3. Find high-impact test ideas and hypotheses
Knowing what to test separates productive experiments from random changes. Before you build a single variant, you need a structured process for generating test ideas grounded in actual visitor behavior, not internal preferences. The best ideas come from data you already have, not from guessing what another brand tested on a completely different audience with different goals.
Where to look for test ideas
Your analytics platform and user behavior tools are the most reliable sources for identifying friction points on your landing page. Look at scroll depth reports to find where visitors stop reading, check click maps to see which elements attract attention but lead nowhere, and review form abandonment rates to find where users drop off before completing your goal. These sources point directly to the gaps between visitor intent and page performance.

The page element that gets the most attention but produces the fewest conversions is your highest-priority test candidate.
Pull data from these four sources to build a list of evidence-backed test ideas for a b testing for landing pages:
- Heatmaps and click maps: Identify elements visitors click that are not CTAs, or CTAs that receive low interaction despite strong page traffic
- Session recordings: Watch real user sessions to spot hesitation, rage clicks, or repeated scrolling that signals confusion
- Exit surveys: A short one-question survey asking "What stopped you from signing up?" gives direct qualitative input that numbers alone cannot provide
- Analytics funnel reports: Find the specific step where the largest percentage of visitors exits before converting
Write a hypothesis before you build anything
Every test idea needs to become a structured hypothesis before it turns into a variant. A hypothesis forces you to state what you are changing, why you expect it to perform better, and which metric will confirm the result. Without this structure, you cannot extract lessons from your tests because you never defined what a meaningful outcome looked like.
Use this template to document every hypothesis before building:
| Field | Example |
|---|---|
| Change | Replace generic headline with a specific outcome-focused headline |
| Because | Scroll data shows 60% of visitors leave before reaching the CTA |
| We expect | Form submission rate will increase |
| We will measure | Form submission conversion rate over a minimum of 2 weeks |
Keep a running test log so your team can reference every past hypothesis, avoid testing the same element twice, and build a compounding record of what your specific audience responds to.
Step 4. Build variants and choose a testing tool
With a documented hypothesis in hand, you are ready to build your challenger variant and select the platform that will run the experiment. This step is where your test idea becomes a real, measurable experiment, and the decisions you make here directly affect how clean and actionable your results will be.
Build your variant with one focused change
Your variant should reflect exactly what your hypothesis states, nothing more and nothing less. If your hypothesis targets the headline, change only the headline text and leave every other element identical to the control. Teams that add a new button color, rearrange the form, and rewrite the subhead all at once cannot trace a conversion lift back to any single decision. Keep the scope narrow so the data stays usable.
When building the variant, apply these rules to stay disciplined:
- Copy the control page exactly before making any changes to ensure an identical baseline
- Edit only the element named in your hypothesis
- Use the same imagery, layout structure, and color palette unless the imagery itself is what you are testing
- Save a written record of every change made, including the exact copy or element used in the challenger
Choose the right testing tool for your setup
Your choice of testing platform determines how easily you can split traffic, track conversions, and read results. The right tool depends on your technical setup, your monthly traffic volume, and how much control you need over targeting and segmentation. The table below covers the most widely used options across different use cases for a b testing for landing pages.
| Tool | Best For | Technical Requirement | Starting Price |
|---|---|---|---|
| Google Optimize (via VWO or successor) | Budget-conscious teams | Low | Varies |
| VWO | Mid-size businesses | Low to moderate | Paid plans |
| Optimizely | Enterprise-level testing | Moderate | Enterprise pricing |
| Convert.com | Compliance-focused teams | Low | Paid plans |
| Unbounce Smart Traffic | Teams building on Unbounce | None | Included in plan |
The fastest path to reliable results is the tool your team will actually use consistently, not the one with the longest feature list.
Most teams getting started with landing page testing do well with a mid-tier platform that integrates directly with their existing analytics setup and supports visual editing without requiring developer involvement on every test.
Step 5. Run the experiment the right way
Launching your test is not the finish line, it is the starting point. How you manage the experiment during its runtime determines whether your results are trustworthy enough to act on. Most failed tests do not fail because the hypothesis was wrong; they fail because the experiment was stopped too early, ran during an anomalous traffic period, or got contaminated by external changes made to the page mid-test.
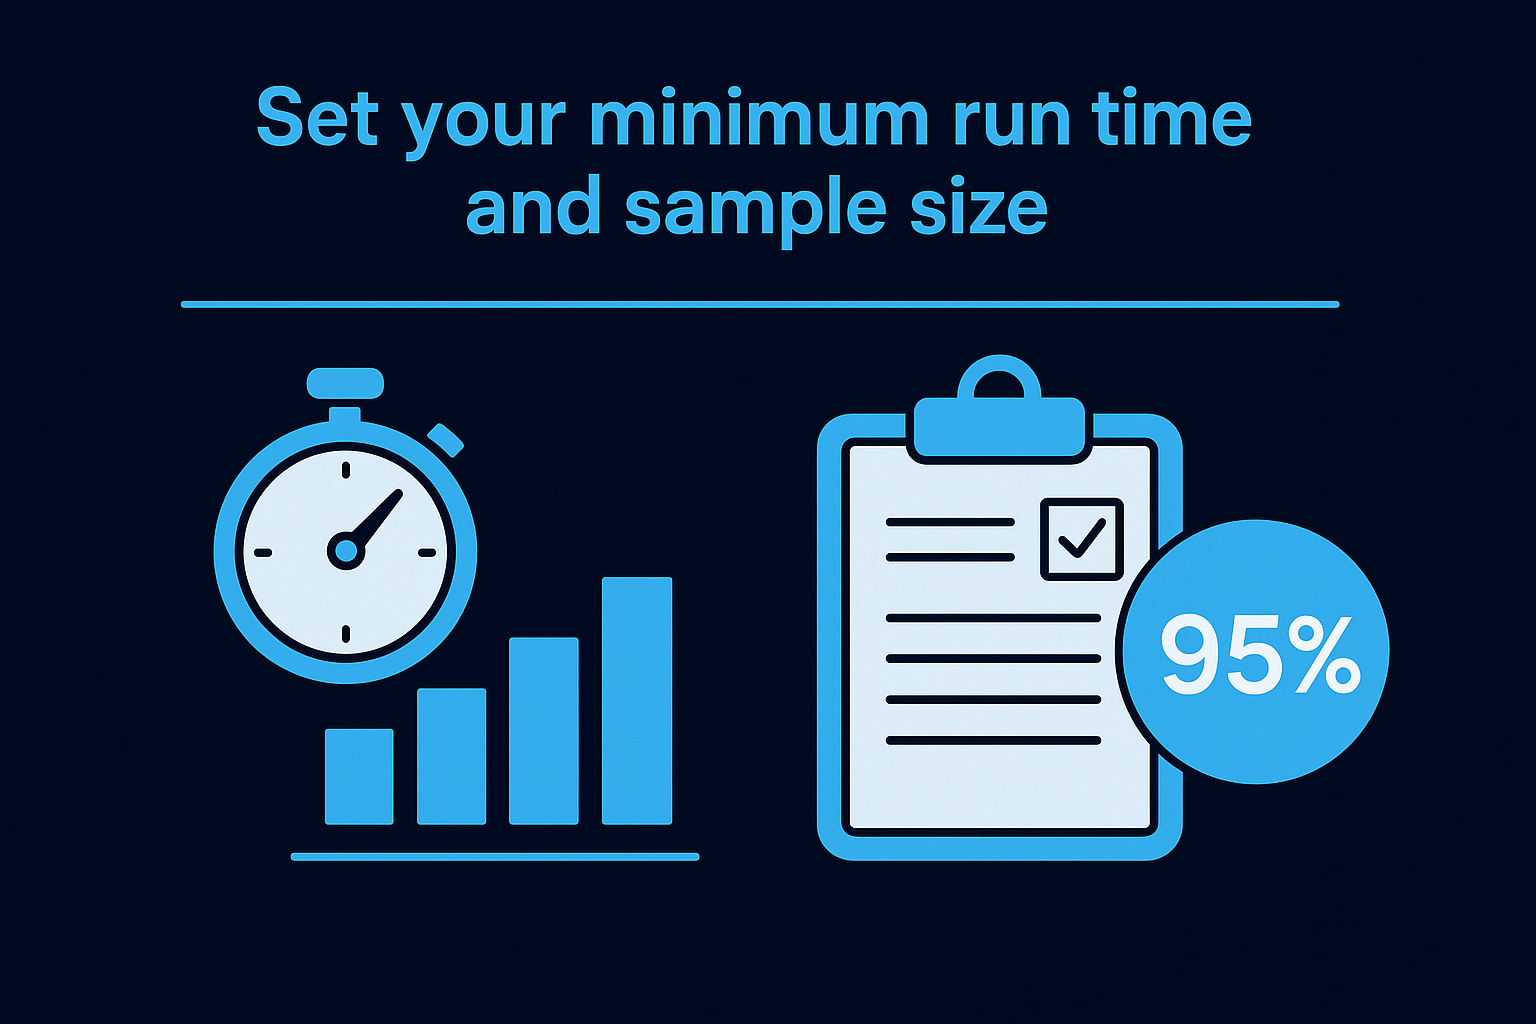
Set your minimum run time and sample size
You need to calculate your required sample size before you start the clock, not after you see promising numbers in your dashboard. Running a test until it "looks good" is the fastest path to a false positive. Use Google's publicly documented statistical guidance to understand confidence levels, then plan your experiment to reach at least 95% statistical confidence before reading results.
Calling a test early because the variant is winning at day four is one of the most common ways teams waste a full development cycle.
As a practical starting point, use this planning template before every test in your a b testing for landing pages program:
| Field | Your Input |
|---|---|
| Current conversion rate | e.g., 3.2% |
| Minimum detectable effect | e.g., 0.5% absolute lift |
| Required confidence level | 95% |
| Daily unique visitors per variant | e.g., 500 |
| Estimated minimum run time | Calculate using a sample size calculator |
| Hard end date | Set before launch, do not adjust |
Run your test for a minimum of two full business weeks regardless of how quickly you hit sample size. This window captures at least two complete weekly traffic cycles and smooths out day-of-week behavioral differences that would otherwise skew your data.
Avoid test contamination
Contamination happens when something changes during the experiment that affects visitor behavior in ways unrelated to your variant. Do not push new ad campaigns, change your organic posting volume, or modify any page element on either variant while the test is live. Each of these actions introduces a variable you cannot control for, and your results become impossible to attribute to the element you were actually testing.
Assign one person on your team to own the test from launch to completion. That person's job is to watch for unexpected traffic spikes, tracking errors, or page errors and to flag them immediately rather than waiting until the analysis phase, when the damage is already done.
Step 6. Analyze results and decide what to ship
When your experiment reaches its planned end date, resist the urge to scan the dashboard for a quick verdict. Proper result analysis in any a b testing for landing pages program follows a deliberate sequence, and skipping steps here is how teams end up shipping changes that hurt rather than help their conversion rate.
Read the numbers in the right order
Start with statistical confidence, not conversion rate. A variant that lifts your conversion rate by 20% but only reaches 78% confidence is not a winner; it is noise. Your result needs to hit at least 95% statistical confidence before you treat any lift as real. Most testing platforms display this directly in their results dashboard, but you can also verify it manually using Google's statistical significance documentation.
A high conversion lift with low confidence is the testing equivalent of a coin flip; you cannot build a growth strategy on it.
Once confidence clears the threshold, check your secondary metrics to confirm the variant did not improve one number by degrading another. A headline change that lifts form submissions but doubles your bounce rate may signal that you are attracting unqualified visitors, not better-fit leads. Review at least these metrics before declaring a winner:
- Primary KPI: Form submission rate, click-through rate, or your defined conversion event
- Bounce rate: Did engagement drop despite the conversion lift?
- Session duration: Are visitors spending meaningful time or leaving immediately after converting?
- Traffic quality: Check for unusual referral patterns or bot traffic that inflated results
When to ship, hold, or iterate
Use this decision framework after every completed test to keep your program moving without shipping bad decisions:
| Result | Action |
|---|---|
| 95%+ confidence, primary KPI improved, secondary metrics stable | Ship the variant |
| 95%+ confidence, primary KPI improved, secondary metrics degraded | Investigate before shipping |
| Below 95% confidence | Extend the test or increase traffic to the page |
| No meaningful difference between variants | Document the null result and move to the next hypothesis |
Documenting null results is as important as logging wins. A test that shows no difference tells you the element you changed does not significantly influence your visitors' decision, which narrows your focus and makes your next hypothesis sharper.
Wrap-up and what to do next
A/B testing for landing pages is not a one-time project; it is a compounding system. Each test you complete gives you a sharper baseline, a cleaner hypothesis, and a stronger page to run the next experiment against. The six-step framework covered here gives you everything you need to start: a defined goal, clean tracking, evidence-based hypotheses, a disciplined runtime, and a results analysis process that separates real wins from noise.
Start with the page that receives the most traffic and carries the highest conversion impact in your funnel. Pick one element, write your hypothesis, and run your first test to statistical significance. Every confirmed winner you ship becomes your new control, and that compounding effect is what separates pages that plateau from pages that consistently improve.
If your landing pages are catching traffic but not converting it, apply to work with our team and get a free 40+ slide strategy covering your full content-to-conversion system.