
A Hootsuite content calendar gives you one place to plan, schedule, and visualize every post across your social channels, without juggling spreadsheets or sticky notes. It's one of the platform's most practical features, and getting it set up correctly from the start makes everything downstream easier.
But here's what most guides won't tell you: a calendar is only as good as the strategy feeding it. At SocialRevver, we build data-driven content systems for founders, creators, and business owners who need more than a scheduling tool, they need a pipeline that turns posts into pipeline. We've seen firsthand how the right calendar setup becomes the backbone of consistent, high-performing content when paired with real strategy.
This guide walks you through everything you need to get your Hootsuite content calendar working for you. You'll learn how to set it up step by step, how to schedule posts efficiently, and where to find free templates that actually save time. Whether you're managing one brand or several, this is the practical walkthrough that gets you from zero to organized.
What the Hootsuite content calendar is and why it works
The Hootsuite content calendar is a visual scheduling interface built directly into the Hootsuite dashboard. It lets you see every scheduled post across all your connected social accounts in a single view, organized by day, week, or month. Instead of tracking posts in a separate spreadsheet or bouncing between platforms to check what's going live, you manage everything from one centralized location. That shift alone removes a significant amount of coordination overhead for any team managing more than one channel.
What the calendar actually shows you
When you open the calendar view, you see a color-coded layout of your scheduled and published content organized across time. Each post block shows the social network, publishing time, and a content preview. You can filter by profile, content type, or tag, which makes it easy to check whether you're balanced across platforms or overloaded on one channel. The calendar also shows content status, so you can see at a glance what's in draft, what's pending approval, and what's already live.
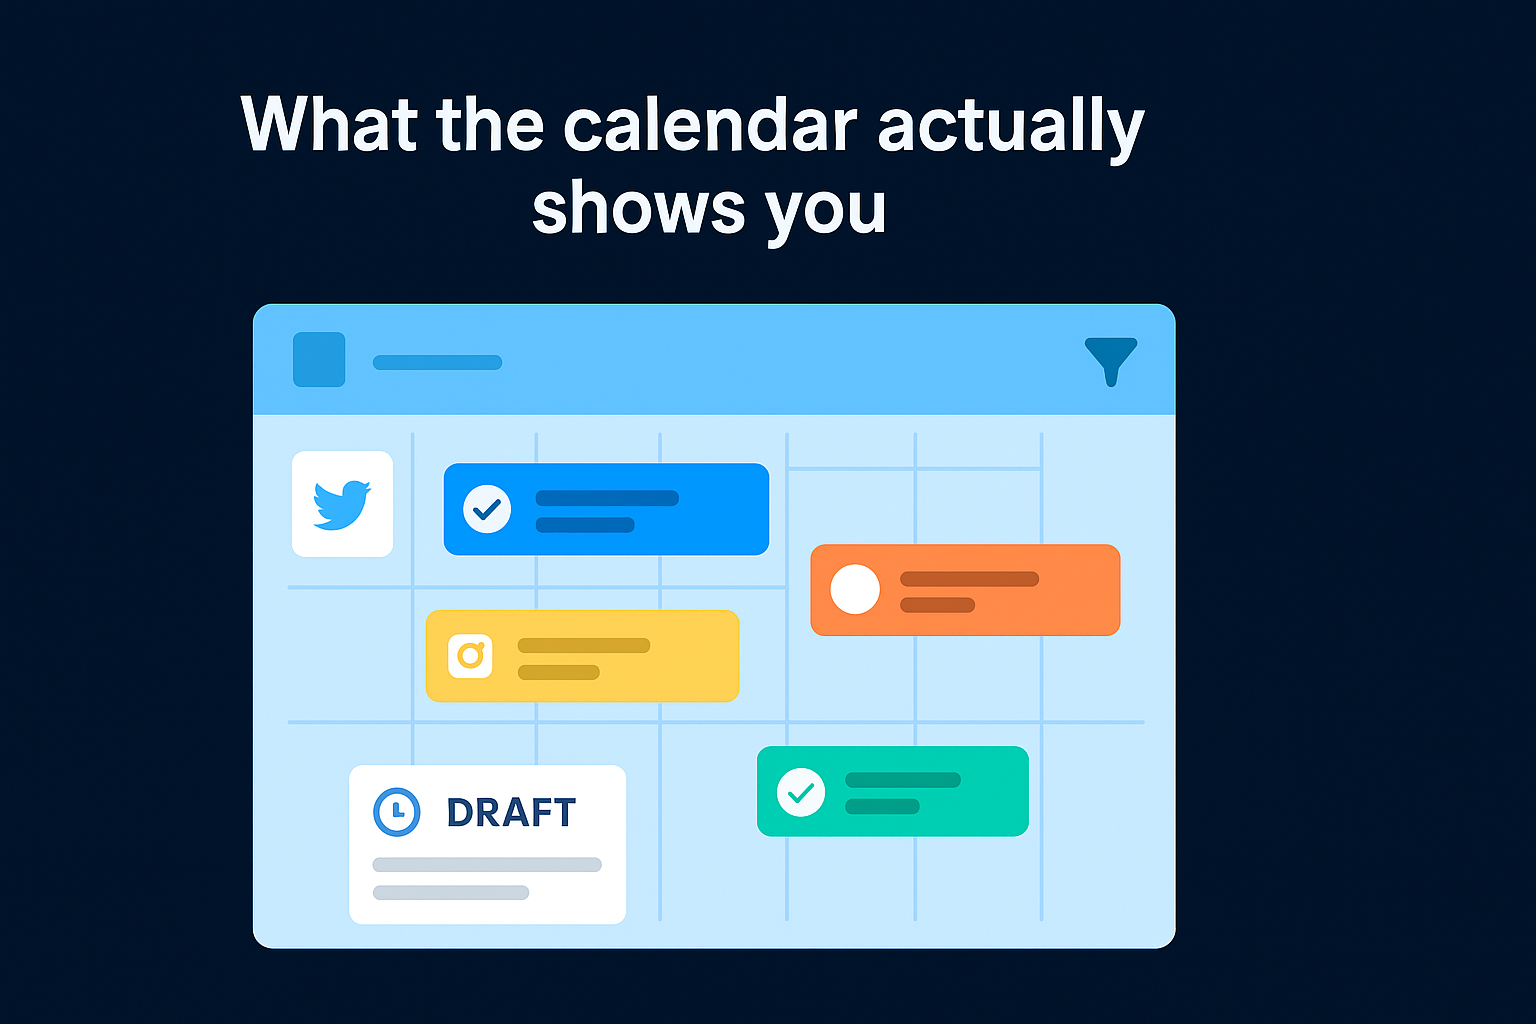
Visibility at the planning stage is what separates teams that post consistently from teams that scramble every week.
Here's what a typical Hootsuite calendar view displays:
| Element | What it tells you |
|---|---|
| Post status | Draft, scheduled, published, or needs approval |
| Platform icon | Which social network the post targets |
| Scheduled time | Exact day and time each post publishes |
| Content preview | Thumbnail or text snippet for quick scanning |
| Tags and labels | Custom labels for campaign or content type tracking |
Why the calendar outperforms spreadsheets
A shared spreadsheet can track post ideas, but it cannot push content live, flag scheduling conflicts, or show you real-time gaps in your posting schedule. The Hootsuite calendar integrates planning and execution in the same tool. When you drag a post to a new time slot, it reschedules automatically. When a post goes live, it moves to a published state without any manual update from your team.
Managing multiple brands or clients becomes far more controlled with this setup. You can switch between organizations, check each calendar independently, and never risk cross-posting content to the wrong account. The permission system also means only authorized team members can publish or edit, which cuts errors without slowing anyone down.
How the publishing layer connects to the calendar
The calendar is not just a visual planner. It sits on top of Hootsuite's publishing and approval infrastructure, which means every action you take in the calendar connects directly to the posting workflow. When you create a post from the calendar view, it enters the same queue and approval chain as posts created anywhere else in the platform. There is no separate system to manage alongside it.
This integration matters because your content planning and content execution happen in the same place. You do not draft in one tool, schedule in another, and approve in a third. Everything flows from the calendar outward, which keeps your process consistent and your team aligned on exactly what goes out and when. For founders and business owners who need to stay hands-off on daily content operations, that single-system structure is what makes the calendar genuinely useful rather than just another tab to monitor.
What you need before you set it up
Before you touch a single setting in Hootsuite, spend ten minutes gathering what you actually need. Skipping this step means you will hit permission errors, missing account connections, or a misconfigured posting schedule halfway through setup. Having the right information and access ready upfront turns what could be a fragmented, multi-day process into a clean, single-session task you can finish and move forward from.
The right Hootsuite plan for calendar access
Not every Hootsuite plan gives you the same calendar functionality, and this affects which steps in this guide apply to you. The free plan limits you to two social accounts and basic scheduling, while the Professional plan expands that to one user and ten social accounts with full calendar visibility. If your team needs collaborative workflows with structured approvals and multiple contributors, you need the Team plan or higher. Check your current plan before you start, because approval workflows and content tagging, two features covered in detail later in this guide, require Team-level access or above.
Upgrading mid-setup forces you to redo configuration steps, so confirm your plan before you begin.
| Plan | Social Accounts | Users | Calendar + Approvals |
|---|---|---|---|
| Free | 2 | 1 | Basic only |
| Professional | 10 | 1 | Full calendar, no approvals |
| Team | 20 | 3 | Full calendar + approvals |
| Business | 35 | 5+ | Full calendar + advanced permissions |
Account and team details to gather first
Pull together your social account login credentials for every platform you plan to connect, including Instagram, LinkedIn, Facebook, X, TikTok, YouTube, and Pinterest. Admin or editor-level access to each account is required, not just the login credentials. If you manage accounts on behalf of a client, confirm that you hold the correct role in their Business Manager or equivalent admin panel before you start the setup process.
You also need a clear picture of your team structure before configuring the Hootsuite content calendar. Write down who is responsible for drafting content, who reviews it, and who holds final publishing authority. Hootsuite's permission system maps directly to those roles, and setting up the wrong permissions from the start means someone either cannot complete their work or has more access than they should. Taking ten minutes to map this out in advance means you configure team permissions once, correctly, and never need to backtrack or guess mid-launch.
Set up your calendar views and publishing defaults
Log into Hootsuite and navigate to the Publisher section in the left-hand menu, then click the calendar icon to open the calendar interface. Before you start adding posts, take five minutes to configure how the calendar displays your content and what default settings it applies when you publish. Getting these defaults right means every post you create from this point forward inherits the correct time zone, view layout, and scheduling preferences without requiring manual adjustments each time.
Choose your default calendar view
Hootsuite gives you three calendar views: day, week, and month. Each one fits a different task, and switching between them is fast once you understand when to use which. Day view works best when you are reviewing exact post timing on a high-volume publishing day. Week view is the most practical for regular planning sessions, because it shows your full content spread across seven days without too much compression. Month view is what you want when you are mapping out a campaign or checking for coverage gaps across a longer content period.
Use the toggle in the top-right corner of the calendar to switch views. Hootsuite remembers your last-used view and opens there by default on your next session. You can also use the profile filter dropdown at the top of the calendar to isolate one social account or view everything across all connected profiles at once. Set this combination before your first planning session so your calendar loads exactly the way your workflow requires it.
Configure your publishing defaults
Your time zone setting is the most critical default to configure before scheduling anything in the Hootsuite content calendar. If it is wrong, every post publishes at the wrong local time, and that error compounds quickly across a full content calendar. Navigate to your Account Settings, select Regional Settings, and confirm the time zone matches the primary market you are targeting.
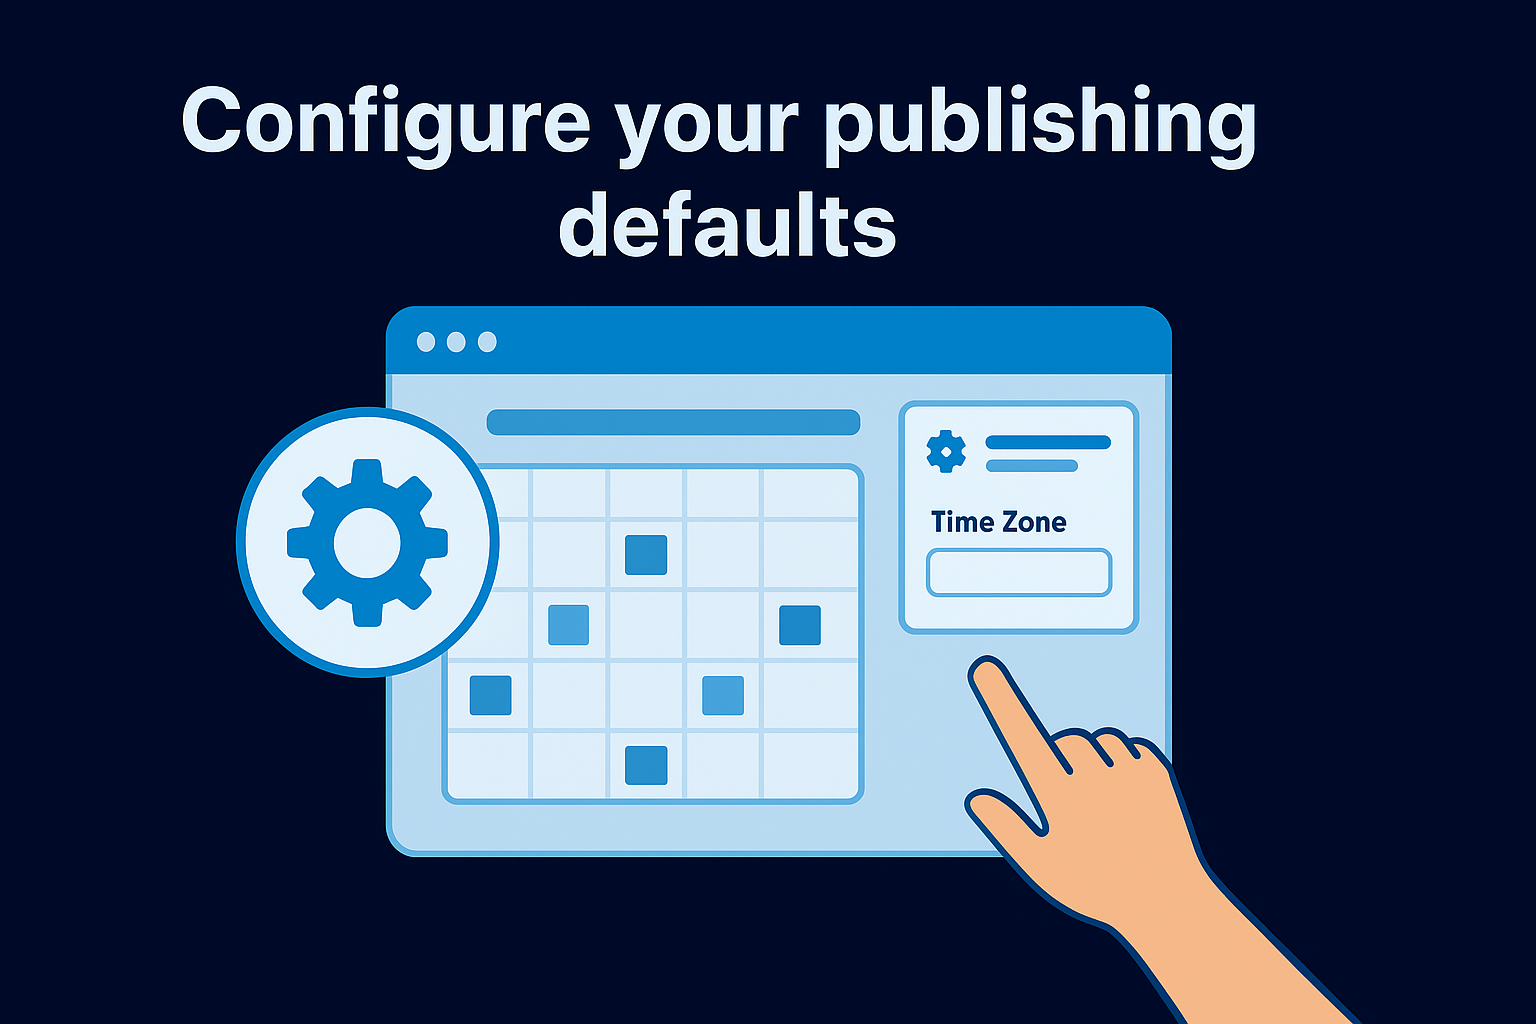
Fix the time zone before you schedule a single post. Correcting it later means manually adjusting every draft already in your queue.
Once the time zone is confirmed, open Publisher settings and configure your AutoSchedule time slots. These are the default publishing windows Hootsuite uses when you do not assign a specific time to a post. Add three to five daily slots that reflect your audience's peak engagement periods, and every new post you create will automatically inherit those windows without requiring you to select a time manually each time.
Connect social accounts and lock down permissions
With your calendar views and publishing defaults in place, the next step is connecting every social account you plan to manage through the Hootsuite content calendar. This is where your planning environment becomes operational. Navigate to My Profile in the left sidebar, then click "Manage Social Networks" to open the account connection screen. From there, you can add profiles across Instagram, LinkedIn, Facebook, X, TikTok, YouTube, and Pinterest by clicking the platform icon and completing the authentication flow for each one.
Add and authenticate each social profile
Click the platform you want to connect and follow the OAuth authorization prompt that opens in a new window. Hootsuite requests only the permissions it needs to read analytics and publish content, and you will confirm those permissions on the platform's own login screen. Once authorized, the account appears in your connected profiles list and becomes available as a publishing destination inside the calendar.
Before you move on, check each connection individually and confirm the correct account authenticated. It is easy to accidentally connect a personal profile instead of a business page, especially on Facebook, where the authorization window shows multiple pages and accounts at once. Select the exact profile or page you intend to manage and verify it appears with the correct name and avatar in your Hootsuite dashboard before proceeding.
A misconnected account will silently misdirect your scheduled posts, and you will not catch the error until content goes live in the wrong place.
Assign team roles and restrict access by function
Once your accounts are connected, set up your team member permissions before anyone else logs in. In the Settings menu, navigate to "Members" and invite each team member by email. Hootsuite offers three core roles for team-level plans and above: Super Admin, Admin, and Member. The table below shows what each role can do:
| Role | Create Posts | Approve Posts | Manage Accounts | Invite Members |
|---|---|---|---|---|
| Super Admin | Yes | Yes | Yes | Yes |
| Admin | Yes | Yes | Yes | No |
| Member | Yes | No | No | No |
Assign the Member role to anyone who only drafts or schedules content. Reserve Admin access for team leads who review and approve before publishing, and keep Super Admin access limited to one or two people who manage the overall account. Locking down permissions this way means drafts cannot go live without a proper review, and no one outside your core leadership can alter account connections or billing settings.
Build a content calendar template that fits your team
A template removes the blank-page problem every time your team sits down to plan. Instead of rebuilding the same structure week after week, you start from a pre-filled framework that reflects your content types, channels, and publishing rhythm. The Hootsuite content calendar does not ship with a one-size-fits-all template, so building your own inside the platform, or importing one into your workflow, is worth doing before your first real planning session.
Pick a structure based on your publishing volume
Your template should match how often your team actually posts, not some idealized schedule. If you publish three to five times per week across two or three platforms, a weekly template is the right unit. If you manage multiple clients or brands with daily publishing across five-plus channels, a monthly template broken into weekly blocks keeps your planning sessions manageable without losing visibility.
Build your template around the publishing volume you can sustain, not the volume you think you should hit.
Start simple. A weekly template covering five to seven post slots across your active platforms gives you enough structure to plan ahead without overwhelming your team in the first few weeks. Once your workflow stabilizes, you can add content categories, campaign labels, and performance columns.
A weekly content calendar template to start from
Copy the table below into a shared document or use it as the base structure when setting up post labels and tags inside Hootsuite. Each row represents one scheduled post, and each column captures the information your team needs to create, review, and publish it without back-and-forth questions.
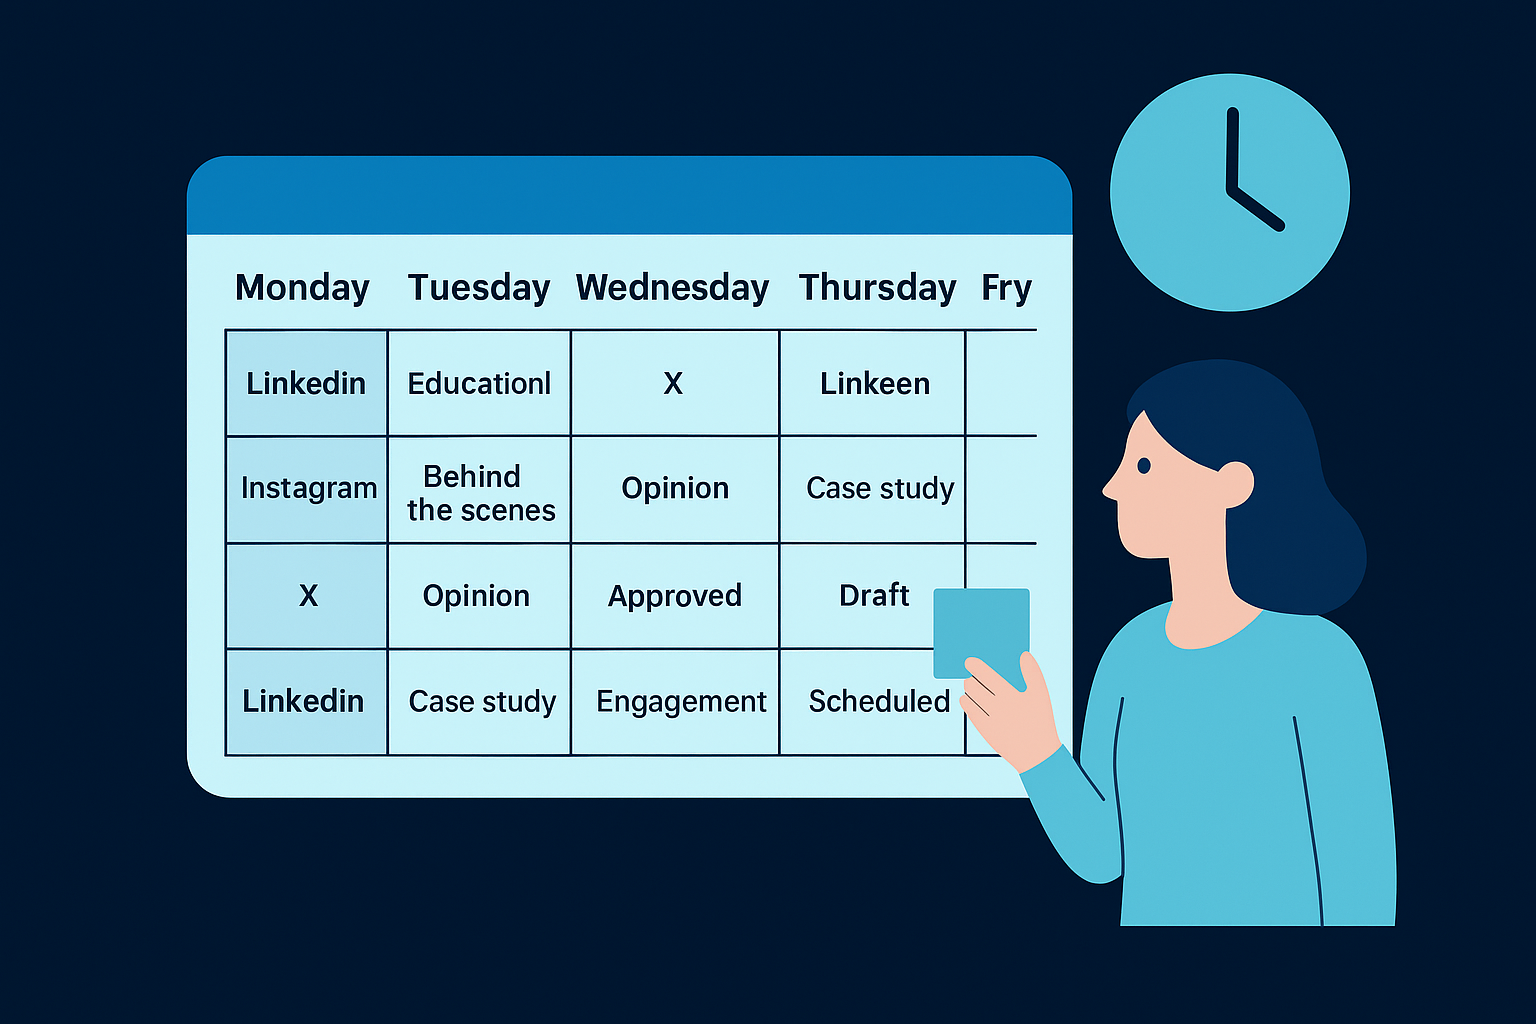
| Day | Platform | Content Type | Topic or Hook | Caption Draft | Visual Asset | Status |
|---|---|---|---|---|---|---|
| Monday | Educational | Industry stat + takeaway | [Draft here] | [File link] | Draft | |
| Tuesday | Behind the scenes | Team or process clip | [Draft here] | [File link] | Needs review | |
| Wednesday | X | Opinion | Hot take on niche topic | [Draft here] | None | Approved |
| Thursday | Case study | Client result or outcome | [Draft here] | [File link] | Draft | |
| Friday | Engagement | Question or poll prompt | [Draft here] | [File link] | Scheduled |
Once you have this template finalized, recreate the content type and status labels as custom tags inside Hootsuite. Tagging each post this way lets you filter the calendar by content type, spot imbalances in your mix instantly, and hand off individual posts to the right team member by role without any verbal coordination.
Create posts faster with a repeatable workflow
A repeatable workflow means your team follows the same creation steps every time, which cuts decision fatigue, reduces back-and-forth, and keeps your Hootsuite content calendar fully stocked without anyone scrambling at the last minute. The goal is to standardize the inputs so the output becomes predictable.
Draft content in batches, not one post at a time
Batching is the single biggest time-saver in content creation. Instead of writing one post, then designing the visual, then scheduling it, then moving to the next one, you complete one task type across all posts before moving to the next. Write all captions for the week in one sitting, then source or create all visuals in the next session, then schedule everything in a final pass.
Batching reduces context-switching, which is where most content creation time actually gets lost.
This approach works because each task requires a different mental mode. Writing is generative, design is visual, and scheduling is administrative. Mixing them slows you down. Block dedicated time on your calendar for each phase, treat them as separate work sessions, and your output per hour will increase significantly.
Use a post creation checklist for every piece of content
A checklist prevents the small errors that slow down approvals and cause republishing headaches. Build one that every team member follows before marking a post as ready for review. Here is a starting template you can adapt:
Pre-submission post checklist:
- Caption written and proofread
- Call to action is clear and specific
- Visual asset attached and properly sized for the target platform
- Correct social profile selected in Hootsuite
- Publish date and time confirmed against the content calendar
- Relevant content tag applied for campaign, content type, or series
- Approval assigned to the correct reviewer
Run through this list on every post before it moves out of draft status inside Hootsuite. Teams that skip this step spend more time in revision than in creation, which defeats the purpose of building a system in the first place.
Set up bulk scheduling for high-volume periods
Hootsuite's bulk scheduling feature lets you upload up to 350 posts at once using a CSV file. This is useful when you are planning a campaign launch, managing a content sprint, or handing off a full month of content to a client. Download Hootsuite's CSV template from the publisher settings, fill in your post data column by column, and upload the file directly to the calendar.
Schedule and publish posts without mistakes
Scheduling a post in the Hootsuite content calendar is straightforward, but the step most teams rush is the final review before hitting confirm. Small errors at this stage, like a wrong time zone, a missing visual, or the wrong account selected, compound fast when you have dozens of posts queued across multiple platforms. Taking sixty seconds to verify the right details before confirming each post prevents the kind of mistakes that require public corrections or deleted content later.
Confirm your publish settings before clicking schedule
When you create a post in Hootsuite Publisher, the scheduling panel shows your selected social profiles, publish date, exact time, and content preview all in one column on the right side of the screen. Before you click "Schedule," check each field deliberately rather than scanning quickly. Confirm that the correct profile is highlighted and not defaulting to a different connected account, which is a common error on accounts that manage multiple brands with similar names.
Run through this checklist before confirming every scheduled post:
- Verify the target social profile matches your calendar plan
- Confirm the publish time reflects your correct time zone
- Check that the visual asset attached is the right file for that post
- Confirm any first comment or link-in-bio update is included if required
- Read the caption one final time for typos before locking it in
One misaligned profile or time slot sends the wrong content to the wrong audience, and correcting it publicly costs more time and credibility than a sixty-second check ever would.
Use the preview feature before every post goes live
Hootsuite's post preview panel shows you exactly how your content will render on each platform before you confirm the schedule. Click the preview icon in the composer to toggle between platform views, because character limits, image cropping, and link card display all differ by network. A caption that reads cleanly on LinkedIn may truncate on X if you exceed the character threshold.

Check the preview for every post before it enters your publishing queue. Pay specific attention to how images crop on Instagram, where the aspect ratio directly affects whether your visual communicates what you intended. If the crop looks wrong in preview, fix the asset sizing before scheduling rather than catching the error after the post is already live and pulling engagement you cannot reset.
Run approvals and collaboration in one place
The approval process is where most content teams lose time. Posts sit in someone's inbox, feedback arrives through three different channels, and the person responsible for scheduling has no clear signal that a post is actually ready to go live. The Hootsuite content calendar solves this by keeping every approval action, comment, and status change inside the same tool where your content lives. You stop chasing people across email and Slack and start moving posts through a structured, visible review chain without any coordination overhead.
Set up an approval workflow in Hootsuite
To activate approvals, navigate to Organization Settings, then select "Approval Workflows" from the left menu. Click "Create Workflow" and assign a name that reflects the team or brand the workflow covers. From there, you select which team members act as approvers and in what order. Hootsuite supports sequential approval chains, meaning a post must clear one reviewer before reaching the next. This structure works well when a content strategist reviews for messaging and a brand manager signs off on tone before anything publishes.
Once your workflow is saved, link it to the relevant social profiles or teams inside the same settings panel. Every post created under those profiles will automatically route through the assigned workflow when a team member submits it for review. The approver receives a notification inside Hootsuite and can approve, reject, or request changes directly from the post view without logging into any other tool.
A two-step approval chain with clear role assignments eliminates the most common bottleneck in content publishing: unclear ownership of the final call.
Use the template below to define your approval workflow before you build it in Hootsuite:
| Step | Reviewer Role | Action if Approved | Action if Rejected |
|---|---|---|---|
| Step 1 | Content Strategist | Passes to Step 2 | Returns to drafter with comments |
| Step 2 | Brand Manager | Post marked approved | Returns to Step 1 with notes |
Keep feedback centralized with post-level comments
When a reviewer rejects a post or requests a revision, they leave a comment directly on the post inside Hootsuite rather than sending a separate message. The drafter receives a notification, makes the edit inside the composer, and resubmits for review. Every comment, edit, and status change is logged in the post history, so you always have a clear record of what changed and who requested it.
This approach keeps your entire team working from one source of truth. No one needs to ask where a post stands or what feedback was given, because every piece of context is attached to the content itself and visible to everyone with access.
Spot content gaps and plan around peak times
A fully loaded calendar does not automatically mean a well-balanced one. You can have thirty posts scheduled for the month and still find that every single piece covers the same topic in the same format, leaving entire audience segments with no reason to engage. The Hootsuite content calendar makes it easy to filter your scheduled content by tag, platform, and content type so you can see imbalances at a glance and fix them before they cost you reach or conversions.
Find and fix gaps in your content mix
Open your calendar in month view and apply your content type tags as a filter. What you want to see is a healthy spread across educational, promotional, engagement-driven, and brand storytelling posts. If your calendar shows four promotional posts in a row with no educational content in between, your audience will disengage before they ever reach the offer. Tag-based filtering inside the calendar is the fastest way to audit your mix without building a separate spreadsheet to track it.
Use the table below as a starting reference for a balanced weekly content spread across a single platform:
| Day | Content Type | Primary Goal |
|---|---|---|
| Monday | Educational | Build authority and trust |
| Tuesday | Behind the scenes | Increase brand familiarity |
| Wednesday | Engagement | Drive comments and shares |
| Thursday | Case study or proof | Support purchase decisions |
| Friday | Promotional | Convert a warm audience |
Adjust the ratio based on your audience's behavior data, but never let any single content type dominate more than two consecutive days in your schedule. Variety signals to your audience that your account is worth checking consistently, not just when they need something specific from you.
Schedule posts to land during peak engagement windows
Timing matters as much as content quality. Hootsuite's Best Time to Publish feature, available under Publisher settings, analyzes your historical engagement data and recommends the highest-performing time slots for each connected profile. Enable it and compare the suggested windows directly against your current AutoSchedule slots to see where your timing is misaligned.
Posting your best content at the wrong time produces the same result as not posting it at all.
If your audience peaks on LinkedIn between 7am and 9am on Tuesdays and Thursdays, move your highest-value posts into those windows rather than defaulting to a generic midday slot. Pull your platform-specific analytics once a month and update your AutoSchedule time slots to reflect any shifts in when your audience is actually active and responding.
Review results and keep improving the calendar
Scheduling content consistently is only half the job. The other half is reviewing what actually worked and feeding that information back into your Hootsuite content calendar so each planning cycle improves on the last. Without a regular review process, you repeat the same guesses week after week instead of building on real performance data.
Pull the right metrics from Hootsuite Analytics
Open Hootsuite Analytics from the left sidebar and select the date range that matches your last full planning cycle, typically the past 30 days. Look at reach, impressions, engagement rate, and link clicks for each post across all connected profiles. These four numbers tell you whether your content is being seen, acted on, and driving traffic, which covers the full funnel from awareness to conversion.
Aggregate reach tells you how wide your content traveled, but engagement rate tells you whether it landed with the right people.
Filter the analytics view by content type tag to compare how educational posts performed against promotional ones, or how your long-form video posts compared to static images. Hootsuite's report builder lets you export this data as a CSV or PDF if you need to share it with a client or stakeholder outside the platform. Use the table below as a baseline to grade each content type at the end of every review cycle:
| Content Type | Metric to Prioritize | Benchmark to Beat |
|---|---|---|
| Educational | Saves and shares | Above your 30-day average |
| Promotional | Link clicks and conversions | Positive click-through trend |
| Engagement | Comments and replies | Growing response volume |
| Brand storytelling | Reach and profile visits | Week-over-week increase |
Turn data into calendar adjustments
After you identify which content types and time slots produced the strongest results, update your template and AutoSchedule windows before your next planning session. Do not wait until underperforming content piles up before making changes. A monthly review cycle keeps your calendar aligned with actual audience behavior instead of assumptions you made at setup.
Specifically, remove or reposition any posting slot that consistently underperforms across three or more weeks. Replace it with a format or time window that your data shows performs better. Treat your content calendar like a system you refine on a schedule, not a static document you build once and leave running. Small, data-driven adjustments made monthly compound into a measurably stronger content program over time.
Next steps
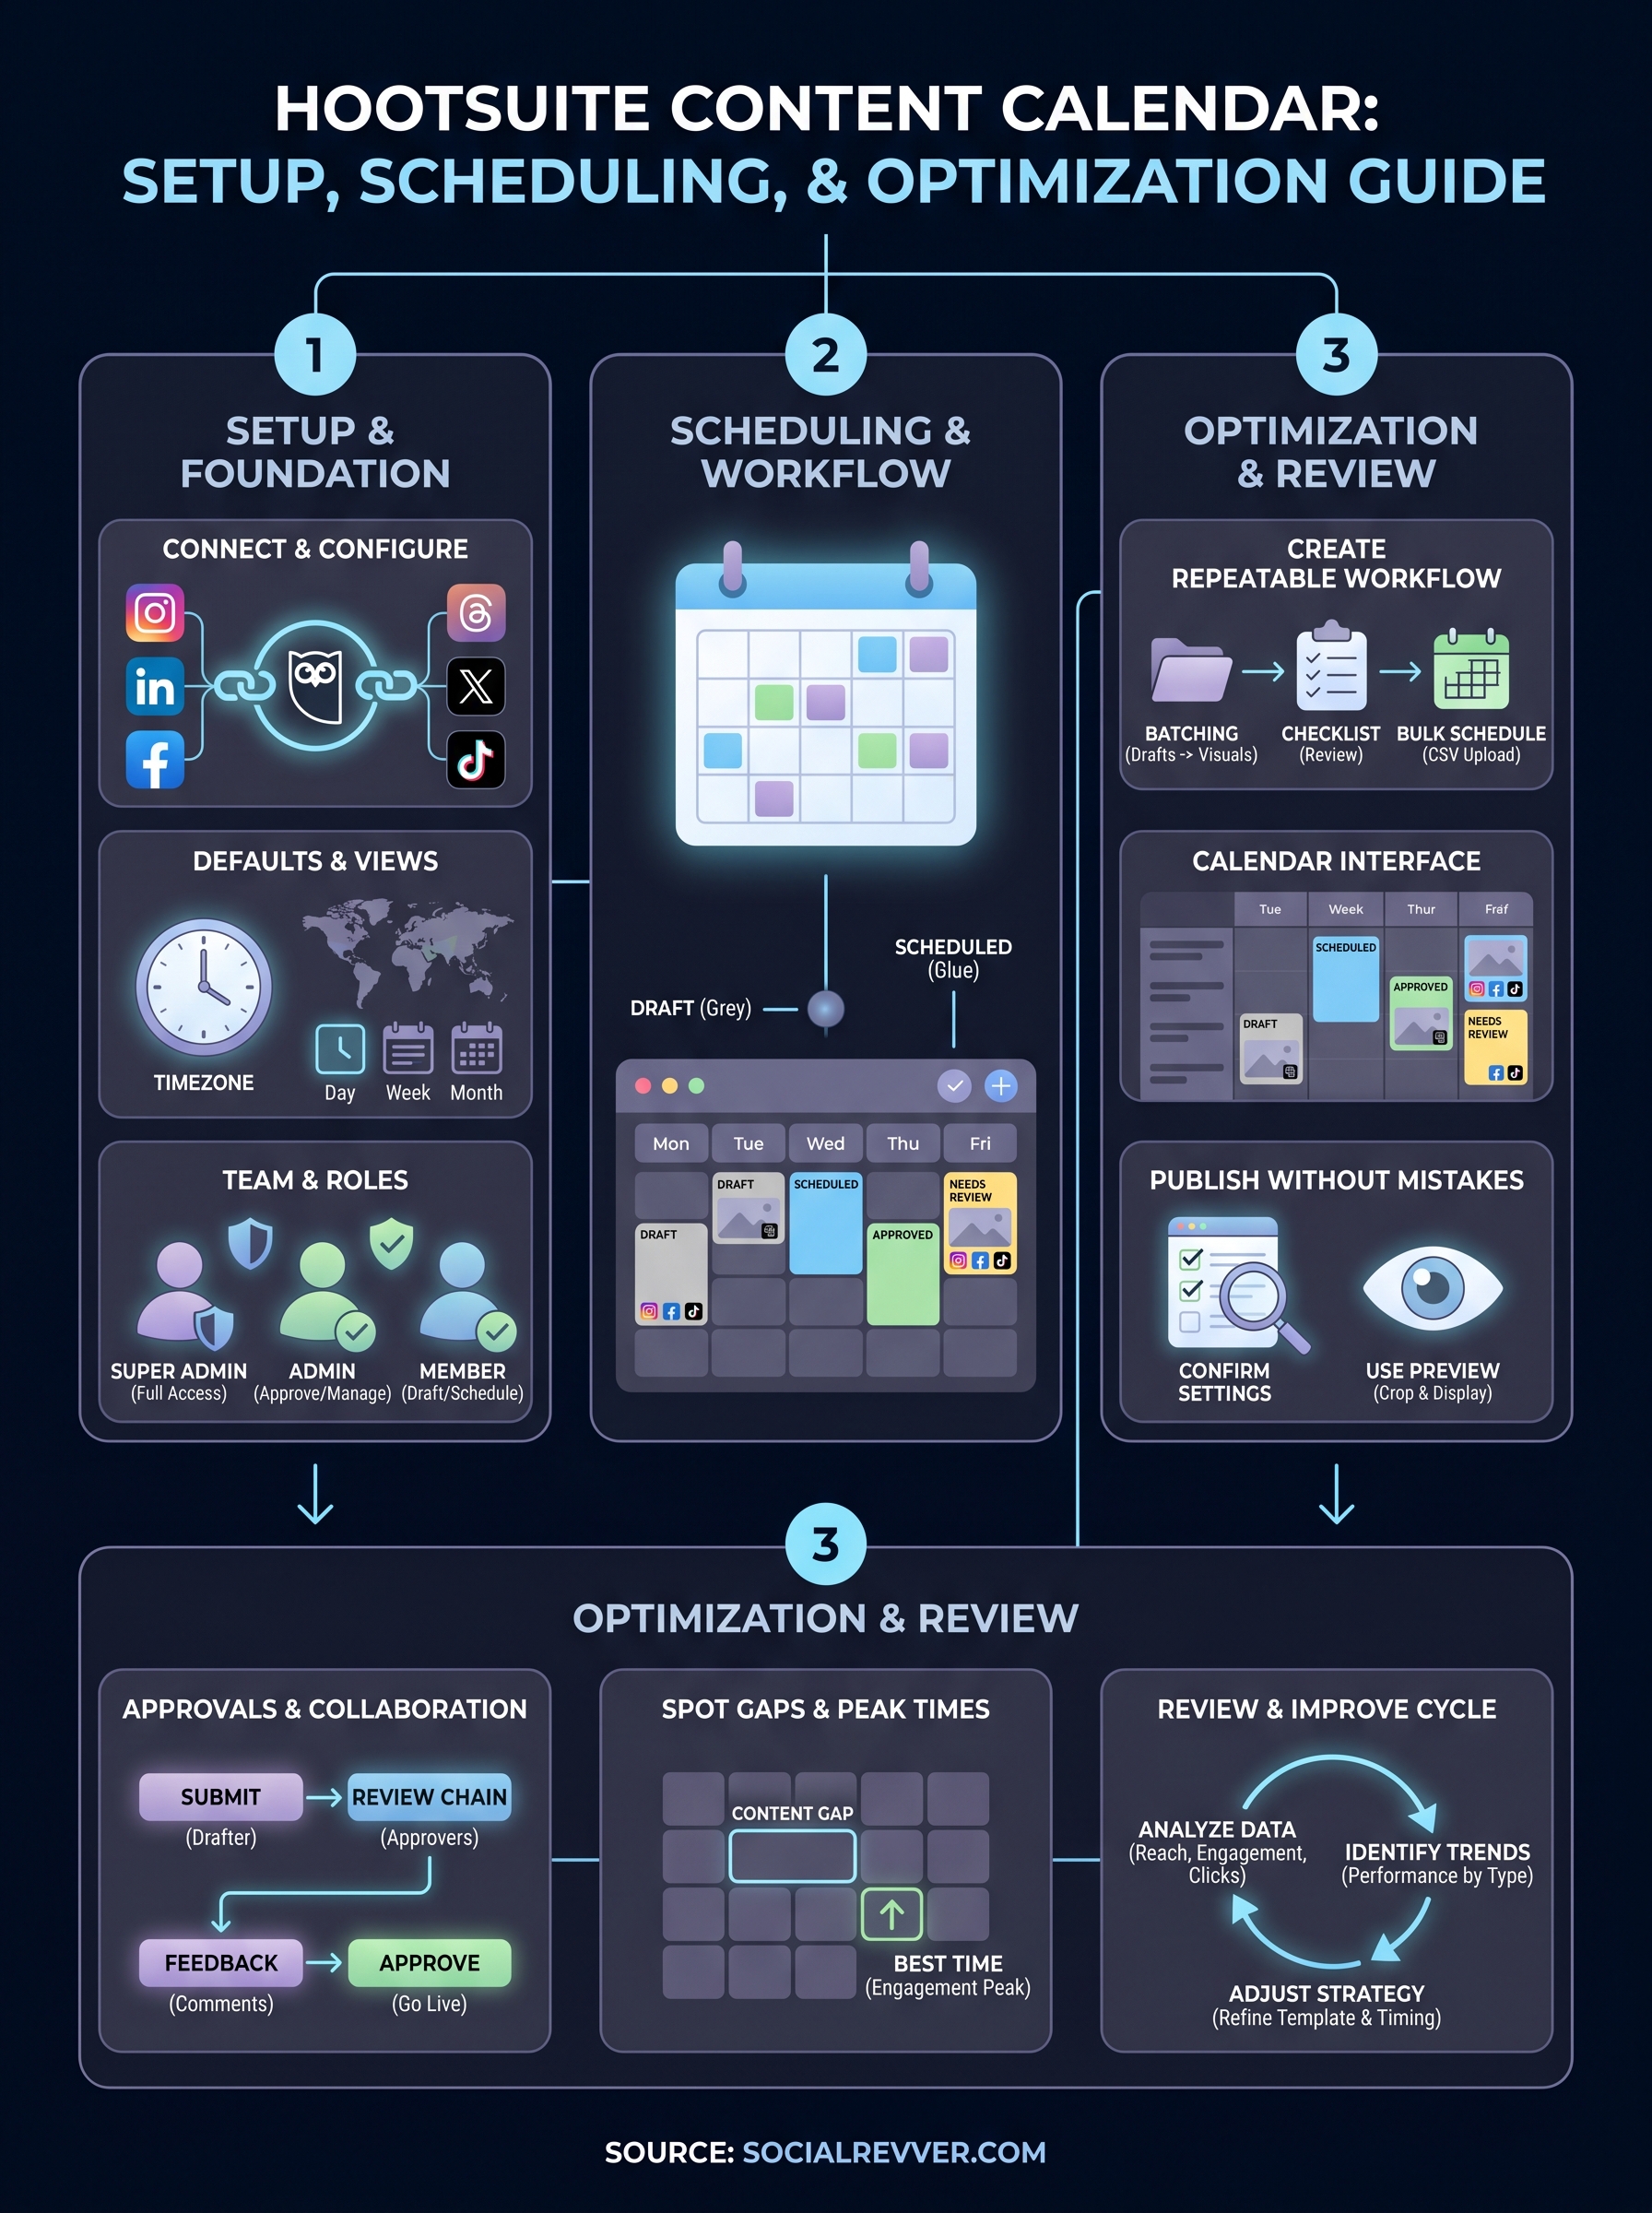
You now have everything you need to build and run a Hootsuite content calendar that your whole team can actually use. You have the setup steps, the scheduling workflow, the approval structure, and the review process to keep it improving over time. The next move is to put it into practice: connect your accounts, load your first two weeks of content, and run one full review cycle before you change anything.
If you find that the calendar gives you clarity but your content strategy still lacks direction, that is a separate problem no scheduling tool can fix on its own. The system has to feed the calendar, not the other way around. If you want a data-driven content strategy built around your brand, audience, and revenue goals, apply to work with our team and get a free 40-plus slide social media strategy built specifically for your business.