Managing a social media presence without a structured posting system is like running a business without a project plan, you might get things done, but you'll waste time and miss opportunities. That's where a Loomly content calendar comes in. It gives you a centralized place to plan, draft, approve, and schedule posts across multiple platforms, so your content pipeline actually stays organized instead of living in scattered Google Docs and Slack threads.
Whether you're a founder building a personal brand or a marketing team coordinating campaigns, Loomly offers a practical framework for keeping your content on track. But here's the thing most people overlook: a calendar tool is only as effective as the strategy behind it. Scheduling posts consistently matters, but scheduling the right posts, ones engineered for attention and conversion, is what actually moves the needle on revenue and authority.
That's exactly the gap we solve at SocialRevver. Our managed content system handles everything from data-driven scripting to distribution optimization, turning short-form video into a predictable growth engine. Tools like Loomly can be a useful part of that workflow, especially for organizing and scheduling deliverables across channels.
In this guide, you'll learn how to set up and use Loomly's content calendar step by step, from creating your first post to building a repeatable scheduling workflow that keeps your social presence running without constant manual effort.
What a Loomly content calendar is and why it helps
Loomly is a social media management platform built around a visual calendar that lets you plan, draft, and schedule content across multiple channels from one dashboard. The loomly content calendar gives you a month, week, or list view of every post across all connected accounts, so you can see gaps, spot clustering, and manage your publishing rhythm at a glance. Rather than toggling between platforms and scattered spreadsheets, you get one organized workspace where ideas, drafts, approvals, and scheduled posts all live together. For teams managing more than one brand, that consolidation alone saves hours every week.
How the calendar view is structured
The calendar view in Loomly organizes your content by date and channel, displaying each post as a card that reflects its current workflow status. You can switch between a monthly overview for big-picture planning and a list view when you need to review copy or post details in sequence. Filtering by label, channel, or team member lets you narrow the calendar to exactly the content that is relevant to you, which becomes especially valuable once you are managing multiple brands or campaigns at the same time. This visual layout makes it easy to identify dead zones in your posting schedule or catch weeks where you are front-loading too much content on a single platform.
Here is a quick breakdown of the main status types you will see in the calendar:
| Status | What it means |
|---|---|
| Idea | A concept or placeholder, not yet drafted |
| Draft | Content written but not yet reviewed |
| Pending Approval | Submitted for stakeholder review |
| Requires Changes | Reviewer sent it back with notes |
| Approved | Ready to schedule or publish |
| Scheduled | Set to publish at a specific time |
| Published | Live on the connected platform |
Why centralization reduces content debt
One of the biggest time sinks in social media management is context switching between tools: drafting in one place, approving in another, scheduling in a third. Loomly solves this by keeping every stage of the content workflow inside the same interface. You, your writers, and your reviewers all operate from a single source of truth, which means fewer dropped handoffs and less time spent tracking down the latest version of a script or creative asset.
A centralized calendar does not just organize posts. It exposes workflow bottlenecks before they turn into missed publishing windows.
How the calendar connects planning to performance
Your content history becomes far more readable when everything lives in one place. When you can see what went live, when, and on which channel, it is easier to connect your publishing patterns to actual performance outcomes. You stop guessing about posting cadence and start making decisions based on what your own data shows. For business owners who need their content to build authority and generate consistent inbound leads, that kind of structured visibility is what separates a repeatable content system from a weekly scramble to fill a feed. The calendar is not the strategy, but it is the infrastructure that makes your strategy visible and executable.
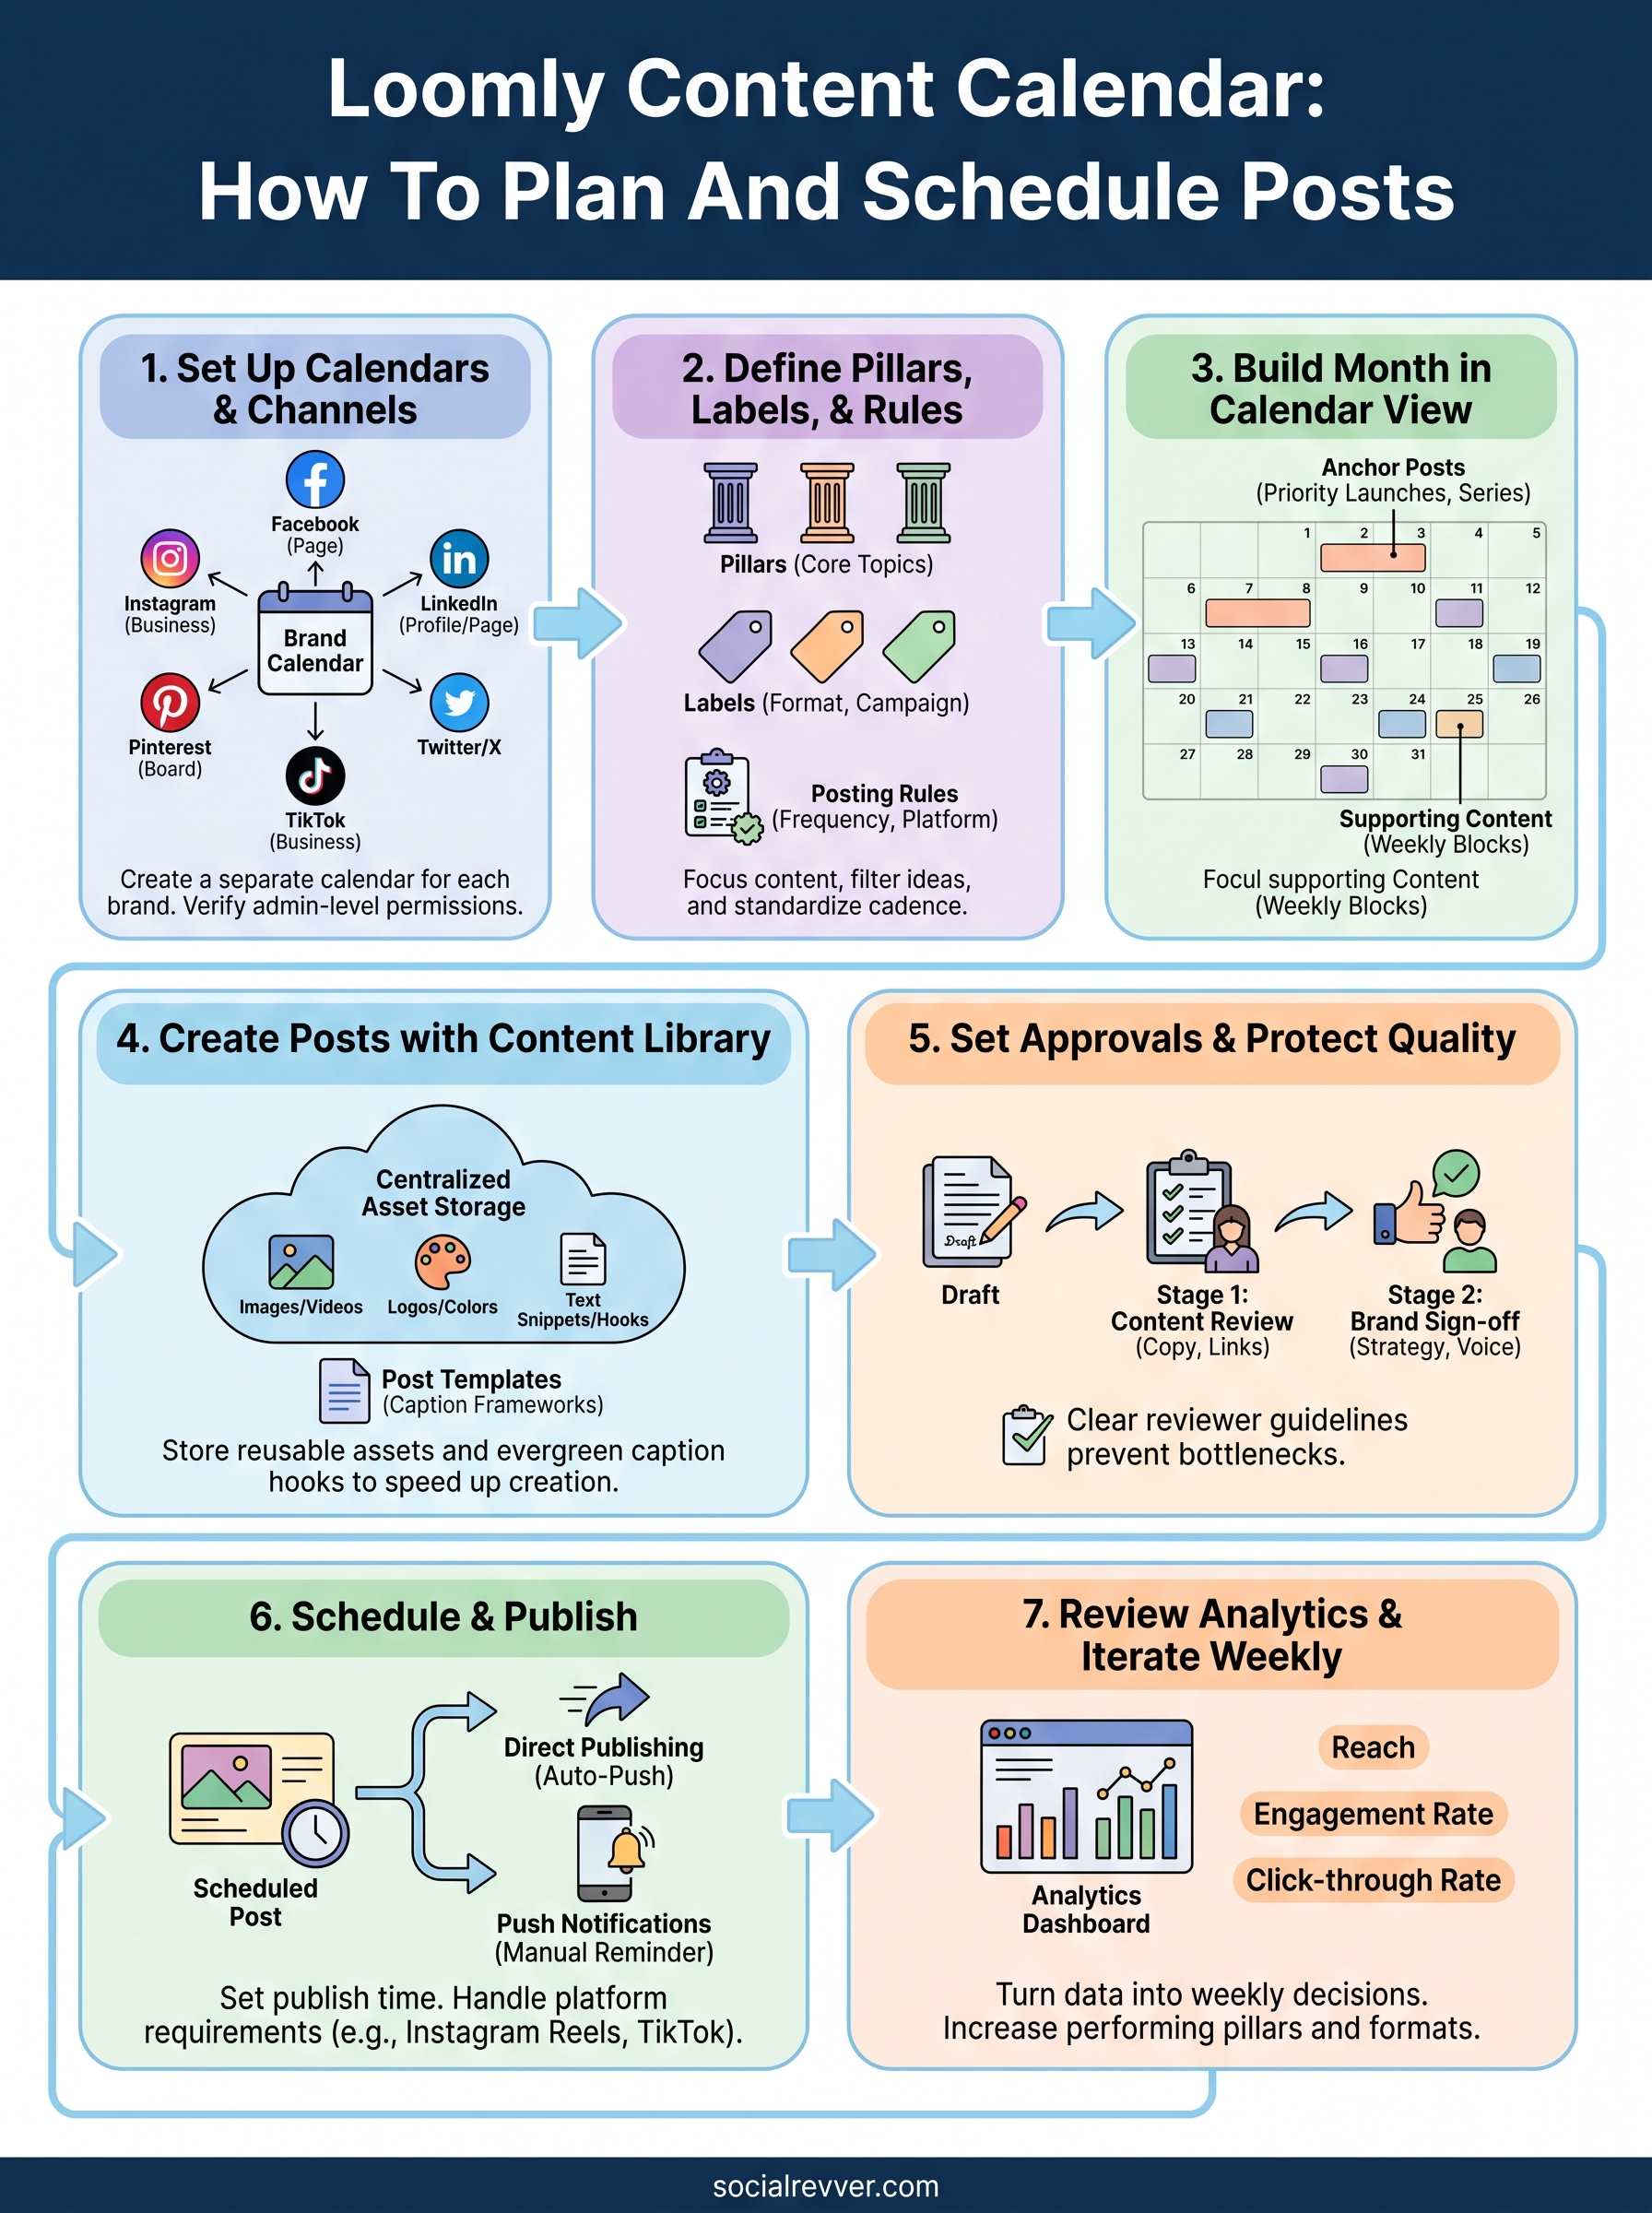
Step 1. Set up your calendars and channels
Before you can use the loomly content calendar to plan anything, you need to wire up your social accounts and create at least one calendar. This first step takes less than ten minutes, but getting it right means you avoid the frustration of reconnecting broken integrations later. Log in to Loomly, navigate to your dashboard, and look for the option to create a new calendar. Give it a clear name that maps to a specific brand or project rather than something generic like "Social Media."
Connect your social accounts
Loomly connects to most major platforms including Facebook, Instagram, Twitter/X, LinkedIn, Pinterest, TikTok, and Google Business Profile. To connect a channel, go to your calendar settings and select "Manage Channels," then authenticate each account directly through its native login. Keep the following in mind for a smooth setup:

- Facebook and Instagram require you to connect through a Facebook Business Page; personal profiles are not supported
- LinkedIn lets you connect both personal profiles and company pages as separate channels
- TikTok requires a TikTok for Business account before you can authorize the connection
- Pinterest connects at the board level, so connect the specific board you plan to post to
If a connection fails, check that you have admin-level permissions on the account you are trying to link. Most failed authentications come down to permission level rather than a platform error.
A broken channel connection will not alert you until a scheduled post fails to publish, so verify every account shows a green connected status before moving forward.
Organize multiple brands or clients
If you manage more than one brand, create a separate calendar for each one rather than lumping everything together. Loomly's calendar structure is designed to keep brands isolated, which means team permissions, labels, and post history stay clean and separated. Name each calendar after the brand it serves and assign team members only to the calendars they actually work on. This keeps your workspace from becoming cluttered and prevents the wrong team member from accidentally editing a post on the wrong account.
Step 2. Define pillars, labels, and posting rules
Before you start filling your loomly content calendar with posts, you need a framework that governs what you publish and how often. Without this structure, your calendar becomes a random collection of posts instead of a deliberate publishing system. Defining pillars, labels, and posting rules upfront takes about 30 minutes and saves you hours of second-guessing every time you sit down to plan content.
Set your content pillars
Content pillars are the two to five core topics your brand consistently covers across every platform. They keep your content focused and signal to your audience what they can expect from you. A business coach, for example, might use pillars like leadership, team hiring, revenue mindset, and behind-the-scenes operations. Write your pillars down and treat them as the filter every post idea must pass through before it gets added to your calendar.
If a post idea does not fit at least one pillar, it does not belong on your calendar.
Use labels to categorize and filter
Loomly lets you create custom labels at the calendar level, and these become one of the most useful organizational tools in the platform. Create a label for each content pillar, then add secondary labels for format types like video, carousel, or static image. When you apply labels to posts, you can filter your calendar view to see only specific content types, which makes it easy to check whether your pillar distribution is balanced across the month.
Here is a simple label structure to start with:
| Label type | Example labels |
|---|---|
| Pillar | Leadership, Revenue, Hiring, Behind the scenes |
| Format | Short-form video, Carousel, Static image, Text post |
| Campaign | Product launch, Weekly series, Event |
Define your posting rules
Posting rules are the guardrails that govern cadence and platform-specific behavior. Decide how many times per week you publish on each channel, which pillars appear on which platforms, and whether certain formats are reserved for specific days. Write these rules in a short reference document and store it in Loomly's content library so every team member follows the same standards.
Step 3. Build a month in calendar view
Once your pillars and labels are in place, you are ready to populate your loomly content calendar with a full month of planned posts. Start by switching to the monthly calendar view in Loomly, which gives you a complete layout of every open date across all connected channels. Working from this view helps you spot imbalances in posting frequency and make sure no single platform gets neglected before you invest time in writing copy.
Place your anchor posts first
Anchor posts are your highest-priority content pieces for the month, such as product announcements, campaign launches, or weekly series entries that must go live on specific dates. Drop these into the calendar first by clicking the "+" button on the target date and selecting the appropriate channel. Assign the relevant pillar and format labels immediately so your filtering stays accurate from the start. Once your anchors are locked in, you have a fixed structure that everything else fills around, which prevents over-scheduling and keeps your calendar balanced across the month.

Place anchor posts before anything else so the constraints of your schedule become visible before you start writing.
Fill the gaps with supporting content
With your anchors set, look at what remains open across each channel. Your goal is to reach your target posting frequency for each platform without clustering all your content on the same days. Use the label filter to check pillar distribution, then add supporting posts to dates that are still empty. A practical approach is to work row by row across the calendar, treating each week as a self-contained content block before moving to the next.
Here is a template for mapping a single week:
| Day | Channel | Pillar | Format | Status |
|---|---|---|---|---|
| Monday | Leadership | Text post | Idea | |
| Wednesday | Behind the scenes | Short-form video | Draft | |
| Thursday | Revenue | Carousel | Idea | |
| Friday | TikTok | Revenue | Short-form video | Draft |
Fill each row with your own pillar and channel choices, then build the actual post from within each calendar card.
Step 4. Create posts faster with the content library
The content library in Loomly is a centralized asset storage system that sits inside your calendar workspace. Instead of hunting through Dropbox folders or Slack messages every time you need a logo, a caption template, or a brand color reference, you store everything once and pull it into posts directly from the editor. This single feature cuts post creation time significantly once you build it out properly.
Store reusable assets in one place
Your content library can hold images, videos, colors, links, and text snippets, all tagged and searchable within Loomly. Start by uploading your core brand assets: logo variations, approved product images, headshots, and any recurring graphic templates. Then add a set of evergreen caption hooks you reuse across pillars, such as opening lines that consistently perform well for your audience. When you open a new post card on your loomly content calendar, you can browse the library directly from the media selector rather than uploading files from scratch each time.
Here is a checklist of assets worth storing from day one:
- Brand logo (multiple formats and background colors)
- Profile photos and team headshots
- Approved product or service images
- Recurring graphic templates (quote cards, tip cards, cover slides)
- Evergreen hooks and opening lines by pillar
- Boilerplate call-to-action copy for each platform
Build and apply post templates
Post templates are pre-structured caption frameworks you create once and reuse whenever a similar post type comes up. A template removes the blank-page problem and keeps your copy format consistent across team members. Build one template per major post type you publish regularly.
A good template does not restrict your writing. It eliminates the setup work so you can focus on the specific message each post needs to deliver.
Here is a simple template structure for a short-form video caption:
| Element | Example |
|---|---|
| Hook line | "Most [audience] get this wrong:" |
| Value statement | One-sentence description of what the video covers |
| Call to action | "Watch to the end and then [action]." |
| Label tag | Pillar label applied in Loomly |
Save each template as a text snippet in your content library so any team member can access it from the post editor without referencing an external document.
Step 5. Set approvals and protect publishing quality
Publishing a post without a review step is one of the fastest ways to damage brand trust. Loomly's approval workflow lets you assign specific team members as reviewers so no post moves from draft to scheduled without a second set of eyes. This becomes especially important when multiple writers contribute to your loomly content calendar, since each person brings slightly different assumptions about voice, format, and messaging standards.
Configure your approval workflow
Loomly lets you build a multi-step approval chain directly inside each calendar's settings. Go to your calendar, open "Settings," and navigate to the "Workflow" tab. From there, you can enable approvals and assign specific team members to each stage. A practical setup has two stages: a content review that checks copy, links, and formatting, and a final sign-off from a brand owner or account manager. Once a writer marks a post as "Pending Approval," the assigned reviewer receives a notification and can approve, request changes, or leave inline comments directly on the post card.
Build your approval chain before you add any posts to the calendar so every draft enters the correct workflow from day one.
Here is a simple two-stage approval structure you can apply immediately:
| Stage | Reviewer role | What to check |
|---|---|---|
| Stage 1 | Content editor | Copy accuracy, grammar, links, labels |
| Stage 2 | Brand owner | Voice, strategy alignment, final sign-off |
Write clear reviewer guidelines
Your approval workflow only works if every reviewer knows exactly what to assess. Create a short reference document listing the specific criteria each stage covers and store it in Loomly's content library. A clear guideline removes ambiguity and prevents revision cycles that slow your publishing cadence.
For each review stage, define three to five non-negotiable checkpoints and write them out explicitly. Here is a starting template you can adapt:
- Post includes a specific call to action
- Correct pillar label is applied
- All links are tested and functional
- Copy matches the approved brand voice
- Media file meets platform dimension requirements
Apply this checklist every time a post reaches your review stage to keep quality consistent across every piece that leaves your calendar.
Step 6. Schedule and publish across platforms
Once your posts clear the approval stage in your loomly content calendar, they are ready to schedule. Loomly gives you two publishing modes depending on the platform: direct publishing, where Loomly pushes the post live automatically at the scheduled time, and push notifications, where Loomly sends a reminder to your phone and you publish manually. Knowing which mode applies to each channel prevents you from assuming a post went live when it actually required a manual step.
Set your publish time for each post
Open an approved post card and click "Schedule." You will see a date and time picker alongside a channel selector if the post targets multiple platforms. Set the exact time you want the post to go live and confirm. Loomly displays all scheduled posts in your calendar view with a clock icon so you can verify your publishing timeline at a glance before closing out for the day.
Use this checklist before confirming any scheduled post:
- Correct date and time are selected for each channel
- Media files are attached and previewed without errors
- All links in the caption are functional
- The correct channel is selected (not a test account)
- Post status updates to "Scheduled" after you confirm
A post in "Approved" status will not publish on its own. You must actively click "Schedule" to move it into the publishing queue.
Handle platform-specific publishing requirements
Instagram Reels, TikTok, and Pinterest require specific media dimensions and file sizes before Loomly will allow scheduling. If a file fails validation, Loomly flags the issue inside the post editor before the post enters the queue. Check the platform's current requirements in the post editor's preview panel, which shows how your content renders on each channel before it goes live. For platforms that only support push notifications rather than direct publishing, turn on Loomly's mobile notifications in your account settings so the reminder reaches you at the right time. Missing a push notification means a scheduled post sits unfinished, which breaks your cadence across the board.
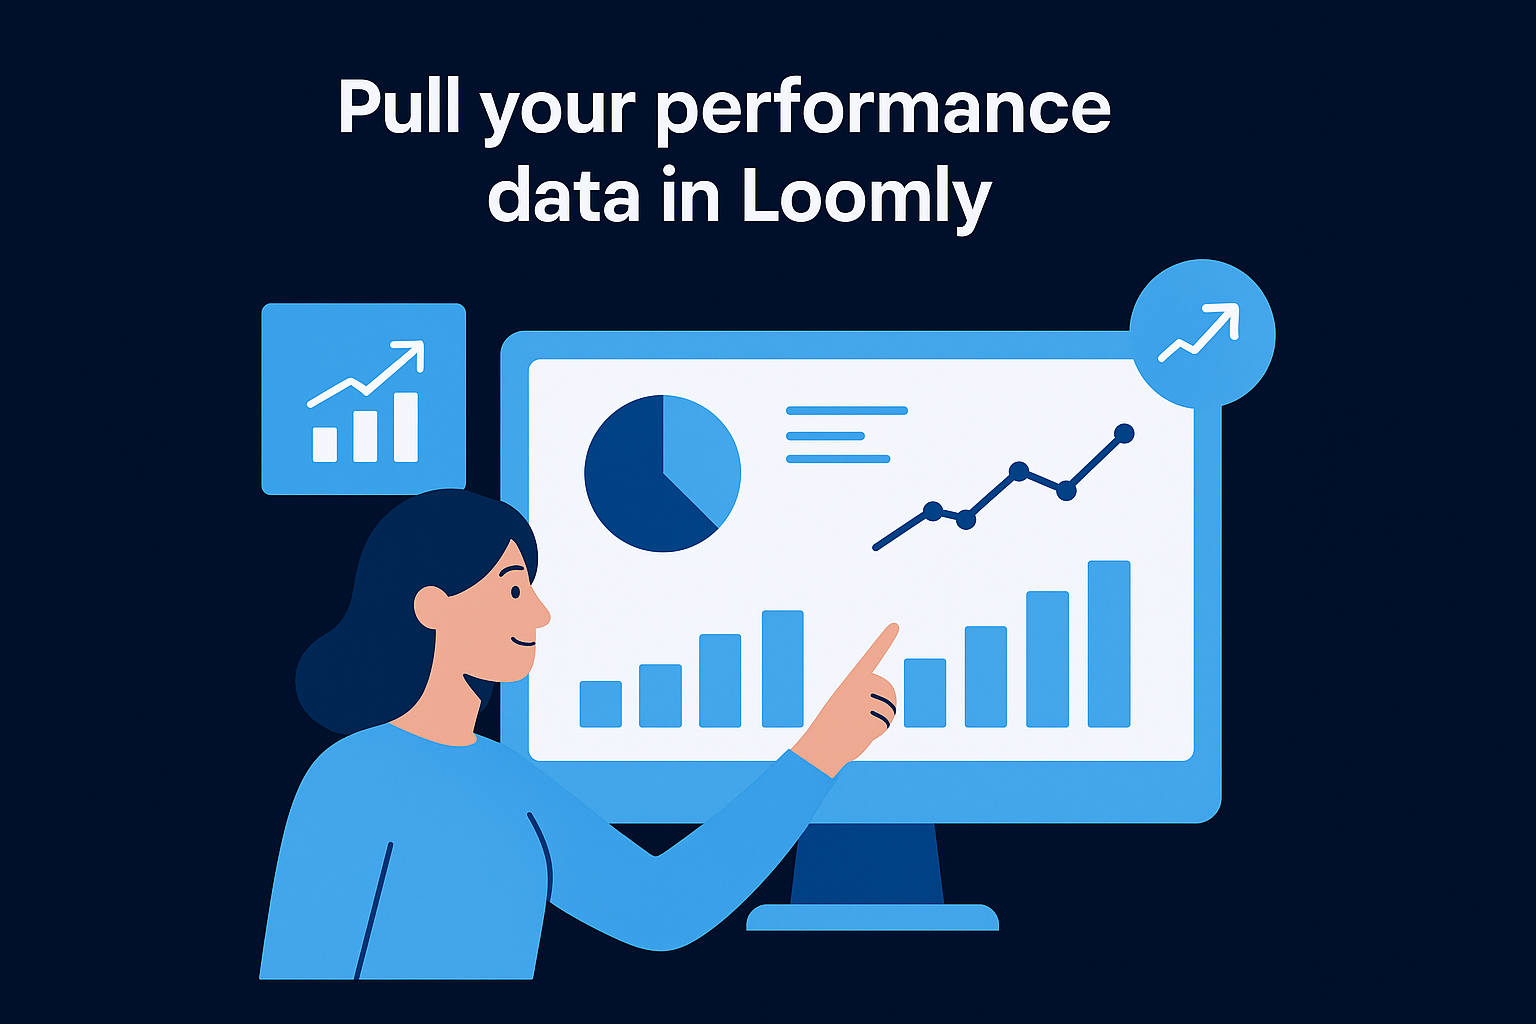
Step 7. Review analytics and iterate weekly
Publishing consistently on your loomly content calendar only creates compounding results if you close the feedback loop every week. Loomly's analytics section gives you post-level performance data across all connected channels, and reviewing it on a fixed schedule is what separates a calendar that improves over time from one that just repeats the same patterns indefinitely. Block 30 minutes every Monday to run this review before you plan the following week's content.
Pull your performance data in Loomly
Loomly's analytics dashboard lives under the "Analytics" tab in each calendar. You can filter performance data by date range and channel, which lets you isolate a single week's results instead of staring at a blended monthly view that hides what actually moved. For each post, check reach, engagement rate, and click-through rate as your three primary signals. Vanity metrics like raw impression counts tell you less than engagement rate relative to your audience size, so weight your attention there.
The metric that matters most is whichever one connects most directly to your business goal, whether that is inbound leads, profile visits, or link clicks.
Use this weekly review template to structure your analysis:
| Question | What to check |
|---|---|
| Which post drove the most engagement? | Format, pillar, day, and time published |
| Which post underperformed your average? | Hook strength, format fit, posting time |
| Which channel outperformed this week? | Compare engagement rate across platforms |
| Did any post generate direct traffic or leads? | Check link click data against your goal |
Turn data into weekly decisions
Once you spot a pattern, act on it immediately rather than storing it as a note you will revisit someday. If a specific pillar consistently outperforms, increase its frequency in the next week's calendar. If a format like short-form video is generating three times the engagement of static images on a given platform, shift your production plan to reflect that. Treat your weekly review as a direct input into your next planning session, not a report you file away.
You're ready to run your calendar
You now have a complete framework for using the loomly content calendar from initial setup to weekly iteration. Each step builds on the last: connected channels feed into a structured posting framework, which feeds into a drafting and approval system, which feeds into a publishing schedule that strengthens every week based on real performance data. The system works because every decision has a documented place, and nothing depends on memory or manual tracking to stay consistent.
Running a reliable calendar is only part of the equation. What you publish, and how well it converts attention into revenue, comes down to the quality of your scripts, your hooks, and your distribution logic. Building and optimizing that side of your content takes dedicated expertise and focused time. If you want a team that handles it for you, apply to work with SocialRevver and get a free 40+ slide social media strategy built around your brand and goals.